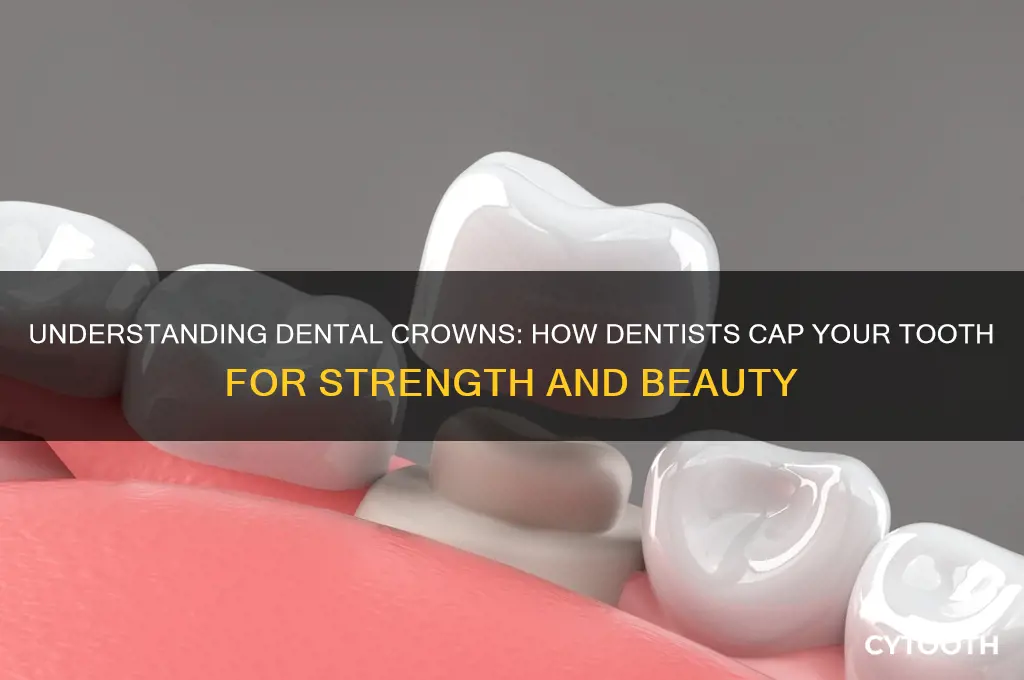
Putting a cap on a tooth, also known as a dental crown, is a common procedure performed by dentists to restore a damaged or weakened tooth. The process begins with the dentist numbing the area to ensure comfort, followed by reshaping the tooth to accommodate the crown. Impressions of the tooth are then taken to create a custom-fitted cap, which can be made from materials like porcelain, ceramic, or metal. While the permanent crown is being crafted, a temporary one is often placed to protect the tooth. Once the final crown is ready, the dentist checks its fit and appearance before permanently cementing it in place, effectively restoring the tooth’s function, strength, and appearance.
| Characteristics | Values |
|---|---|
| Procedure Name | Dental Crown Placement |
| Purpose | Restore a damaged, decayed, or weakened tooth to its original shape, size, and function |
| Materials Used | Porcelain, ceramic, metal (gold, alloy), zirconia, or porcelain-fused-to-metal (PFM) |
| Steps Involved | 1. Consultation & X-rays: Assess tooth condition. 2. Tooth Preparation: File down the tooth to make room for the crown. 3. Impression: Take a mold of the tooth to create a custom crown. 4. Temporary Crown: Place a temporary crown while the permanent one is being made. 5. Crown Fitting: Check fit, color, and bite alignment. 6. Permanent Cementation: Secure the crown with dental cement. |
| Duration | Typically 2-3 visits over 2-3 weeks (varies by case) |
| Anesthesia | Local anesthesia used during tooth preparation |
| Recovery Time | Minimal; mild sensitivity for a few days |
| Aftercare | Avoid hard or sticky foods initially; maintain good oral hygiene |
| Longevity | 5-15 years, depending on material and care |
| Cost | $800-$3,000 per crown (varies by material and location) |
| Common Reasons for Crowns | Tooth decay, cracked or broken teeth, large fillings, root canal treatment, cosmetic improvement |
| Alternatives | Fillings, veneers, or dental implants (depending on the case) |
What You'll Learn
- Preparing the Tooth: Trimming, cleaning, and shaping the tooth to ensure a proper fit for the cap
- Taking Impressions: Creating a mold of the tooth to craft a custom-fitted dental crown
- Temporary Crown Placement: Fitting a temporary cap to protect the tooth while the permanent one is made
- Permanent Crown Fitting: Cementing the final cap onto the tooth after ensuring proper alignment and bite
- Aftercare Instructions: Guidelines for maintaining the crown, including oral hygiene and avoiding hard foods
![]()
Preparing the Tooth: Trimming, cleaning, and shaping the tooth to ensure a proper fit for the cap
The first step in preparing a tooth for a cap, or crown, is a precise trimming process, akin to a sculptor shaping marble. Dentists remove a thin layer of enamel, typically around 1-2 millimeters, to create space for the crown. This reduction is crucial, as it ensures the cap fits seamlessly without adding bulk to the tooth. Imagine a tailor altering a suit—the fabric must be adjusted to fit the wearer perfectly, and so the tooth is tailored to accommodate its new covering.
The Art of Shaping:
This procedure demands a delicate touch. Using a dental drill with a fine bur, the dentist carefully sculpts the tooth, maintaining its structural integrity. The goal is to achieve a uniform reduction, preserving the tooth's natural contours. For instance, a molar requires a different approach than an incisor, with its unique shape and function. The dentist's skill lies in understanding the tooth's anatomy and creating a foundation for the crown, much like an artist preparing a canvas.
Cleaning: A Pristine Canvas
After trimming, the tooth's surface must be immaculate. Any debris or residue can compromise the crown's fit and longevity. Dentists employ a combination of techniques to ensure cleanliness. Air-abrasion, using a stream of fine particles, and ultrasonic scalers, which vibrate at high frequencies, are common tools. These methods remove plaque, tartar, and any remaining tooth material, leaving a smooth, clean surface. It's akin to a painter ensuring their canvas is free of dust before applying the first stroke.
Precision is Key:
The success of a dental crown relies heavily on this preparation phase. An improperly trimmed or shaped tooth can lead to an ill-fitting cap, causing discomfort and potential dental issues. For instance, an uneven surface might result in a crown that sits too high, affecting the patient's bite. Dentists often use digital scans or impressions to create a precise model, ensuring the final crown aligns perfectly with the prepared tooth. This attention to detail is critical, as it directly impacts the patient's oral health and the crown's durability.
In summary, preparing the tooth is a meticulous process, requiring both technical skill and an artistic eye. It involves transforming the tooth into an ideal base for the crown, ensuring a harmonious fit and long-term success. This step is a testament to the precision and care that underpin modern dentistry, where every detail matters in creating a healthy, functional smile.
Understanding Cavity Formation: How Decay Eats Away at Your Teeth
You may want to see also
![]()
Taking Impressions: Creating a mold of the tooth to craft a custom-fitted dental crown
The first step in crafting a dental crown that fits seamlessly and functions flawlessly is taking an accurate impression of the prepared tooth. This process, often overlooked by patients, is a delicate art that combines precision, technology, and a deep understanding of dental anatomy. Using a tray filled with impression material—typically a putty-like substance that hardens over a few minutes—the dentist captures every ridge, groove, and contour of the tooth and surrounding gums. This mold serves as the blueprint for the dental lab, ensuring the crown will align perfectly with the patient’s bite and adjacent teeth. Without a precise impression, even the most expertly crafted crown can fail to meet functional or aesthetic expectations.
From a practical standpoint, the impression-taking process requires both patient cooperation and clinical expertise. The dentist begins by isolating the tooth with a rubber dam to keep it dry and free from saliva, which can distort the impression material. Once the tray is loaded with the material, it’s carefully seated over the tooth, and the patient is instructed to bite down gently but firmly. Holding still for 3–5 minutes is crucial, as movement can introduce bubbles or imperfections into the mold. For patients with a strong gag reflex or anxiety, dentists may use smaller trays or offer sedation techniques to ensure comfort. Modern advancements, such as digital impressions using intraoral scanners, eliminate the need for traditional molds, offering a faster, more comfortable alternative for some cases.
Comparing traditional and digital impression methods highlights the evolution of dental technology. Traditional impressions, while reliable, can be messy and occasionally uncomfortable, especially for patients with sensitive gag reflexes. Digital impressions, on the other hand, use a wand-like scanner to capture thousands of images per second, creating a 3D model of the tooth in real-time. This method reduces chair time, eliminates the need for physical molds, and allows for immediate adjustments if errors are detected. However, digital scanning may not be suitable for all cases, particularly when the tooth preparation is complex or the patient has extensive restorations. Both methods have their merits, and the choice often depends on the dentist’s expertise and the patient’s specific needs.
A critical yet often overlooked aspect of taking impressions is the role of the dental lab technician. Once the mold arrives at the lab, technicians pour it with stone to create a physical model of the tooth. This model is then used to fabricate the crown, ensuring it matches the exact dimensions of the prepared tooth. Even a minor discrepancy in the impression can lead to a crown that doesn’t fit properly, requiring adjustments or, in some cases, a complete remake. Thus, the impression is not just a step in the process—it’s the foundation upon which the success of the entire crown procedure rests. Patients should view this stage as a collaborative effort, where their stillness and cooperation directly contribute to the final outcome.
How Dentists Safely Bring a Tooth Down: The Eruption Process Explained
You may want to see also
![]()
Temporary Crown Placement: Fitting a temporary cap to protect the tooth while the permanent one is made
After a dentist prepares your tooth for a crown by removing decay and shaping it, the vulnerable structure needs immediate protection. This is where a temporary crown steps in, acting as a placeholder until the permanent restoration is ready. Think of it as a bandage for your tooth, shielding it from sensitivity, preventing shifting of surrounding teeth, and maintaining proper bite alignment.
Temporary crown placement is a crucial step in the crown procedure, ensuring comfort and functionality while the permanent crown is meticulously crafted in a dental lab. This process typically takes 2-3 weeks, during which the temporary crown becomes your tooth's guardian.
The temporary crown itself is usually made from acrylic or stainless steel, materials chosen for their durability and ease of shaping. The dentist will select a shade that closely matches your natural teeth for aesthetic purposes. Fitting the temporary crown involves a precise process. First, the dentist cleans and dries the prepared tooth thoroughly. Then, a small amount of temporary cement, a special adhesive, is applied to the inner surface of the crown. This cement is designed to hold the crown securely in place while still allowing for easy removal when the permanent crown is ready. The dentist carefully positions the temporary crown over the prepared tooth, ensuring proper alignment and bite.
Once in place, the cement is cured, often with a special light, to harden and secure the crown.
While temporary crowns are sturdy, they are not as strong as permanent ones. It's important to treat them with care. Avoid chewing hard or sticky foods on the side of your mouth with the temporary crown. Brush and floss gently around the crown to maintain good oral hygiene. If you experience any discomfort or the crown becomes loose, contact your dentist immediately. Remember, the temporary crown is a vital bridge to your permanent restoration, and proper care ensures a smooth transition to your new, permanent smile.
How Braces Gently Pull Teeth Forward: The Orthodontic Process Explained
You may want to see also
![]()
Permanent Crown Fitting: Cementing the final cap onto the tooth after ensuring proper alignment and bite
The final stage of the dental crown procedure is a meticulous process, ensuring the permanent restoration of your tooth's function and aesthetics. This critical step involves cementing the custom-made cap onto your prepared tooth, a task that demands precision and expertise. Here's an insightful breakdown of what this process entails.
The Art of Permanent Crown Fitting:
Imagine a puzzle piece, meticulously crafted to fit seamlessly into its designated space. This is akin to the permanent crown, designed to align perfectly with your bite and adjacent teeth. Before cementing, the dentist will engage in a trial placement, assessing the crown's fit and appearance. This trial run is crucial, allowing for any necessary adjustments to ensure comfort and natural alignment. The dentist will evaluate the bite, checking for any high spots or interferences that might cause discomfort or affect your occlusion. This step is a delicate balance, as even a minor misalignment can lead to long-term issues.
Cementation: A Secure Bond:
Once the crown passes the alignment test, the dentist proceeds with the permanent fitting. Dental cement, a specialized adhesive, is carefully applied to the inner surface of the crown. This cement is not your everyday adhesive; it is biocompatible, ensuring it is safe for use within the oral environment. The type of cement used can vary, with options like resin-based or glass ionomer cements, each offering unique benefits. For instance, resin-based cements provide a strong bond and are aesthetically pleasing, while glass ionomer cements release fluoride, aiding in tooth protection. The chosen cement is mixed to a precise consistency, ensuring it flows evenly and sets at the right time.
Step-by-Step Cementation Process:
- Isolation: The tooth is isolated using a rubber dam, a thin sheet of rubber or latex, to keep it dry and free from saliva, ensuring a clean working area.
- Etching and Priming: The tooth surface is etched with a mild acid to create a microscopic rough surface, enhancing the bond. A primer is then applied to prepare the tooth for cementation.
- Cement Application: The chosen dental cement is carefully applied to the crown's inner surface, ensuring an even layer.
- Seating the Crown: With precision, the dentist positions the crown onto the prepared tooth, using gentle pressure to ensure it is fully seated.
- Excess Removal: Any excess cement is meticulously removed from around the crown and gum line, ensuring a clean finish.
- Setting and Curing: The cement is allowed to set, which may involve light curing for certain types of cement, ensuring a strong and durable bond.
Post-Cementation Care:
After the crown is securely in place, the dentist will provide aftercare instructions. This may include avoiding hard or sticky foods for a short period, maintaining good oral hygiene, and scheduling regular check-ups. It's essential to follow these guidelines to ensure the longevity of your new crown. With proper care, a permanent crown can last for many years, providing a functional and aesthetically pleasing solution to a damaged or decayed tooth.
In summary, the permanent crown fitting is a detailed process, requiring skill and attention to detail. From the initial trial placement to the final cementation, each step is crucial in achieving a successful and long-lasting dental restoration. This procedure showcases the precision and artistry involved in modern dentistry, offering patients a renewed smile and improved oral health.
Understanding Dental Tooth Numbering: A Comprehensive Guide for Patients
You may want to see also
![]()
Aftercare Instructions: Guidelines for maintaining the crown, including oral hygiene and avoiding hard foods
A dental crown, often referred to as a cap, is a custom-made restoration that fits over a damaged or weakened tooth, providing strength, protection, and aesthetic improvement. Once the crown is in place, proper aftercare is crucial to ensure its longevity and maintain oral health. Here’s a comprehensive guide to caring for your new crown.
Oral Hygiene: The Foundation of Crown Care
Maintaining impeccable oral hygiene is non-negotiable after receiving a dental crown. Plaque and bacteria can still accumulate around the crowned tooth, leading to decay or gum disease. Brush twice daily with a soft-bristled toothbrush and fluoride toothpaste, paying extra attention to the gum line around the crown. Floss daily, using a gentle sawing motion to avoid dislodging the crown. For hard-to-reach areas, consider using an interdental brush or water flosser. Your dentist may also recommend an antimicrobial mouthwash to reduce bacterial buildup. Consistency is key—skipping these steps can compromise both the crown and the underlying tooth.
Dietary Restrictions: Protecting Your Investment
While dental crowns are durable, they are not indestructible. Avoid hard, sticky, or excessively chewy foods that could damage or dislodge the crown. Examples include ice, hard candies, nuts, and chewy caramel. Instead, opt for softer foods like yogurt, steamed vegetables, and well-cooked grains. Be mindful of temperature extremes as well—rapid shifts between hot and cold foods can cause discomfort or even crack the crown over time. If you have a habit of grinding your teeth, consider wearing a night guard to prevent undue stress on the crown.
Regular Check-Ups: Prevention Over Repair
Even with meticulous care, crowns require periodic evaluation by a dentist. Schedule check-ups every six months or as recommended by your dentist. These visits allow for professional cleaning, inspection of the crown’s fit, and early detection of any issues. Addressing minor problems promptly can prevent more extensive—and costly—repairs down the line. During these visits, your dentist may also polish the crown to remove surface stains and maintain its appearance.
Practical Tips for Long-Term Success
Small adjustments to your daily routine can significantly extend the life of your crown. For instance, if you play contact sports, wear a mouthguard to protect your teeth and crown from potential trauma. Avoid using your teeth as tools—never open packaging or bite nails, as this can weaken the crown or surrounding teeth. If you notice any unusual symptoms, such as sensitivity, pain, or a loose crown, contact your dentist immediately. Early intervention is often the difference between a simple fix and a major procedure.
By following these aftercare guidelines, you can ensure your dental crown remains functional and aesthetically pleasing for years to come. Proper oral hygiene, mindful eating habits, and regular dental visits are the cornerstones of maintaining this valuable investment in your oral health.
Tooth Replacement Options: How Dentists Restore Your Smile Naturally
You may want to see also
Frequently asked questions
A tooth cap, also known as a dental crown, is a custom-made restoration that covers a damaged or weakened tooth. Dentists may recommend a cap to protect a tooth after a root canal, restore a broken or severely decayed tooth, cover a dental implant, or improve the appearance of a misshapen tooth.
The process involves two main steps. First, the dentist prepares the tooth by removing a small amount of enamel to make room for the crown. Then, they take impressions of the tooth to create a custom cap. A temporary crown is placed while the permanent one is made in a lab. Once ready, the dentist cements the permanent cap onto the prepared tooth.
The procedure is typically painless because the dentist uses local anesthesia to numb the area. Some patients may experience mild sensitivity or discomfort after the anesthesia wears off, but this is usually temporary and manageable with over-the-counter pain relievers.
With proper care, a dental crown can last between 10 to 15 years or even longer. Durability depends on factors like oral hygiene, the material used (e.g., porcelain, metal, or ceramic), and habits like teeth grinding or chewing hard foods. Regular dental check-ups are essential to maintain the crown’s longevity.