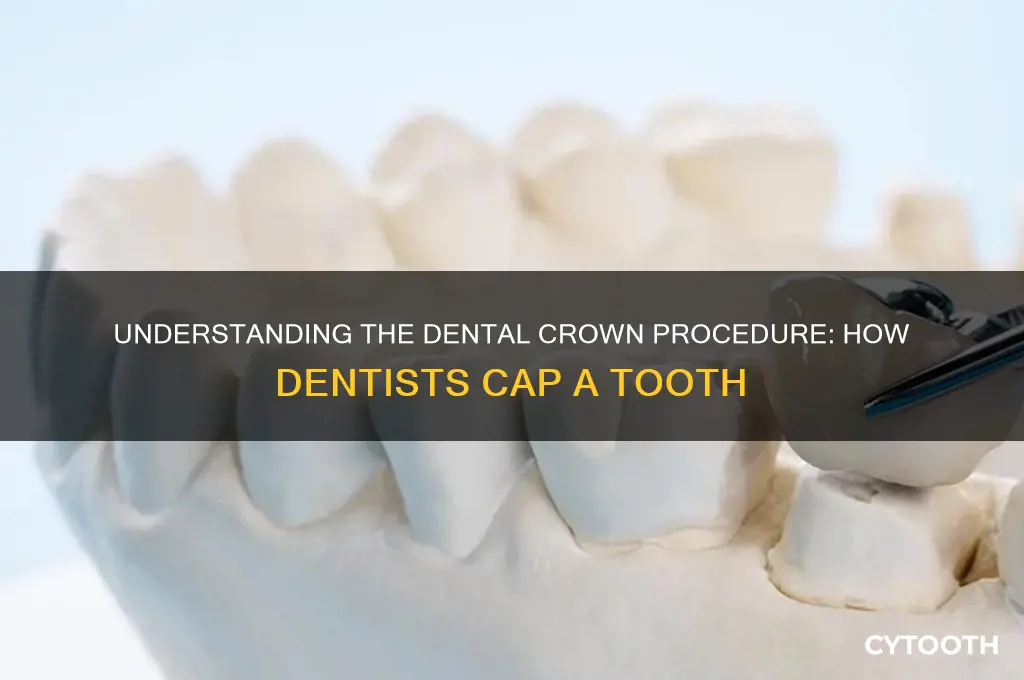
Capping a tooth, also known as placing a dental crown, is a common procedure performed by dentists to restore a damaged or weakened tooth to its original shape, size, and function. This process involves preparing the affected tooth by removing any decay or damaged areas and then shaping it to accommodate the crown. The dentist takes an impression of the prepared tooth to ensure the crown fits perfectly, and this impression is sent to a dental lab where the custom crown is fabricated. Once the permanent crown is ready, the dentist checks its fit and appearance before cementing it permanently into place, effectively capping the tooth and providing long-term protection and stability.
| Characteristics | Values |
|---|---|
| Procedure Name | Dental Crown Placement |
| Purpose | Restore shape, size, strength, and appearance of a damaged or decayed tooth |
| Materials Used | Porcelain, ceramic, metal (gold, alloy), zirconia, or composite resin |
| Steps Involved | 1. Consultation & X-rays 2. Tooth Preparation (filing/reshaping) 3. Impression/Digital Scan 4. Temporary Crown Placement 5. Permanent Crown Fitting & Cementing |
| Tooth Preparation | 1-2 mm of enamel removed to create space for the crown |
| Time Required | 2-3 appointments (1-2 weeks between visits) |
| Anesthesia | Local anesthesia used during tooth preparation |
| Durability | 5-15 years (varies by material and care) |
| Cost Range (USD) | $800 - $3,000 per crown (varies by material and location) |
| Aftercare | Avoid hard/sticky foods, maintain oral hygiene, regular dental check-ups |
| Common Uses | Covering implants, protecting weak teeth, restoring broken/worn teeth, cosmetic improvement |
| Potential Risks | Tooth sensitivity, crown loosening, allergic reaction (rare) |
| Alternatives | Dental fillings, veneers, or extraction (depending on case severity) |
What You'll Learn
- Preparation: Tooth is numbed, decay removed, and shaped for cap placement
- Impression: Mold of tooth taken to create custom-fit crown
- Temporary Cap: Provisional crown placed while permanent one is made
- Permanent Placement: Final crown cemented onto prepared tooth
- Aftercare: Instructions for care, pain management, and follow-up visits
![]()
Preparation: Tooth is numbed, decay removed, and shaped for cap placement
The first step in capping a tooth is ensuring the patient’s comfort, which begins with numbing the affected area. Dentists typically administer a local anesthetic, such as lidocaine or articaine, in doses ranging from 1.8 to 3.6 mL, depending on the procedure’s complexity and the patient’s pain tolerance. This step is crucial because it allows the dentist to work efficiently while minimizing discomfort. For anxious patients, nitrous oxide (laughing gas) or oral sedatives like diazepam may be offered to induce relaxation, though these are not always necessary for routine capping procedures.
Once the tooth is numbed, the dentist focuses on removing decayed or damaged tissue. Using a high-speed dental drill with a burr, they carefully excise the compromised areas, ensuring no decay remains beneath the surface. This process is precise, as removing too much healthy tooth structure can weaken the tooth, while leaving decay behind can lead to further complications. The goal is to create a clean, stable foundation for the cap. For deep decay near the pulp, a sedative filling like calcium hydroxide may be placed temporarily to protect the nerve before proceeding.
Shaping the tooth for cap placement is both an art and a science. The dentist reduces the tooth’s size by approximately 1-2 mm on all surfaces to accommodate the crown’s thickness. This step requires careful consideration of the tooth’s natural anatomy and bite alignment. For instance, molars may need more reduction than incisors due to their functional demands. Impressions or digital scans are then taken to create a custom cap that fits seamlessly. Temporary crowns, often made of acrylic or stainless steel, are placed to protect the prepared tooth while the permanent one is fabricated, a process that typically takes 1-2 weeks.
Throughout preparation, the dentist must balance precision with preservation. Over-preparation can lead to tooth sensitivity or fracture, while under-preparation may result in a poorly fitting cap. Practical tips for patients include avoiding chewing on the temporary crown and maintaining good oral hygiene to prevent irritation. This phase sets the stage for a successful capping procedure, ensuring the final restoration is both functional and aesthetically pleasing.
Understanding Dead Teeth: Causes, Symptoms, and Treatment Options Explained
You may want to see also
![]()
Impression: Mold of tooth taken to create custom-fit crown
A crucial step in the dental crowning process is the impression—a precise mold of the tooth that serves as the blueprint for the custom-fit crown. This procedure demands meticulous attention to detail, as the accuracy of the impression directly influences the fit, function, and aesthetics of the final restoration. The dentist begins by preparing the tooth, removing decay or damaged tissue, and shaping it to accommodate the crown. Once the tooth is ready, a tray filled with impression material is carefully placed over the prepared area. This material, often a vinyl polysiloxane or polyether, captures every contour, ridge, and groove of the tooth and surrounding gums. The patient must remain still for a few minutes while the material sets, ensuring a distortion-free mold.
The impression material is selected based on its properties, such as viscosity, setting time, and accuracy. For instance, light-bodied materials are injected into tight spaces to capture fine details, while heavier materials provide stability for the tray. The dentist may also use retraction cords to gently push back gum tissue, exposing more of the tooth structure for a comprehensive impression. Once the material sets, the tray is carefully removed, leaving behind a detailed replica of the tooth and its surroundings. This mold is then sent to a dental laboratory, where technicians use it to craft a crown that fits seamlessly into the patient’s mouth.
From a comparative perspective, traditional impression techniques are increasingly being supplemented by digital scanning technologies. While conventional impressions offer proven reliability, digital scans provide immediate results and eliminate the discomfort some patients experience with trays and materials. However, the choice between the two depends on factors like the complexity of the case, the dentist’s expertise, and the patient’s preferences. For example, digital impressions are ideal for patients with a strong gag reflex or those requiring multiple restorations, as they streamline the process and reduce chair time.
Practical tips for patients undergoing this procedure include practicing breathing techniques to remain calm during the impression-taking process, as anxiety can lead to movement and compromise accuracy. Patients should also communicate any discomfort or sensitivity to the dentist, who can adjust the technique or material accordingly. After the impression is taken, patients may experience temporary sensitivity or a strange taste from the material, which typically resolves quickly. Following the dentist’s post-impression care instructions, such as avoiding sticky or hard foods, ensures the temporary crown (if placed) remains intact until the final restoration is ready.
In conclusion, the impression is a cornerstone of the dental crowning process, requiring precision, patience, and the right materials. Whether through traditional methods or digital scanning, the goal remains the same: to create a mold that translates into a crown fitting perfectly within the patient’s unique oral anatomy. Understanding this step empowers patients to actively participate in their treatment, ensuring a successful and satisfying outcome.
Dental Implants vs. Natural Teeth: Enhancing Your Smile and Appearance
You may want to see also
![]()
Temporary Cap: Provisional crown placed while permanent one is made
After a dentist prepares your tooth for a crown by removing decay and shaping it, a temporary cap becomes an essential placeholder. This provisional crown, typically made from acrylic or stainless steel, serves multiple purposes while the permanent one is crafted in a dental lab. It protects the prepared tooth from sensitivity, maintains its position, and ensures proper bite alignment. Without this temporary measure, the tooth could shift, causing discomfort and complicating the fit of the final crown.
Consider the process as a two-step journey. First, the dentist takes an impression of your prepared tooth, which guides the lab in creating the permanent crown. This step is crucial for precision, as even minor discrepancies can affect the fit and function. Meanwhile, the temporary cap is cemented in place using a weak adhesive, allowing for easy removal during the second appointment. Patients should avoid sticky or hard foods during this interim period to prevent dislodging the temporary crown, which could expose the vulnerable tooth underneath.
From a practical standpoint, managing a temporary cap requires awareness of its limitations. While it provides functional and aesthetic benefits, it’s not as durable as the permanent crown. Patients might experience minor discomfort, sensitivity to temperature, or a slight difference in bite. These issues are normal and temporary, but persistent pain or looseness warrants an immediate call to the dentist. Proper oral hygiene is also critical; gentle brushing and flossing around the temporary cap prevent plaque buildup and ensure the underlying tooth remains healthy.
Comparatively, the temporary cap is a bridge between the old and the new—a safeguard that ensures the success of the permanent crown. It’s a testament to the meticulous planning and patient care inherent in restorative dentistry. While it may seem like a minor step, its role is indispensable, offering both protection and stability during the waiting period. By understanding its function and following post-placement care instructions, patients can navigate this phase with confidence, knowing the final result will be a durable, natural-looking crown.
Dental Implants vs. Bridges, Dentures: Which Tooth Replacement Option is Best?
You may want to see also
![]()
Permanent Placement: Final crown cemented onto prepared tooth
The final step in the tooth capping process is a pivotal moment, where the temporary crown is replaced with a permanent one, meticulously crafted to blend seamlessly with the patient's natural dentition. This stage, known as permanent placement, is a precise and delicate procedure, ensuring the crown's longevity and the patient's comfort.
A Precise Fit: The dentist begins by removing the temporary crown, carefully examining the prepared tooth and the new permanent crown. This custom-made restoration is designed to fit perfectly over the prepared tooth, ensuring a snug and secure fit. The dentist will check the bite, shape, and color to guarantee it matches the adjacent teeth, creating a natural and aesthetically pleasing result. This attention to detail is crucial, as an improper fit can lead to discomfort, bite issues, or even crown failure.
Cementation Process: Once satisfied with the fit, the dentist will clean the tooth and the inner surface of the crown to ensure optimal adhesion. A dental cement, specifically chosen for its strength and compatibility, is then applied to the crown's interior. This cement acts as a powerful adhesive, bonding the crown to the tooth. The type of cement used may vary depending on the patient's needs and the dentist's preference, with options ranging from resin-based to glass ionomer cements, each offering unique benefits. For instance, resin-based cements provide strong bonding and are ideal for aesthetic restorations, while glass ionomer cements release fluoride, aiding in tooth protection.
Permanent Bonding: With the cement in place, the dentist carefully positions the crown onto the prepared tooth, ensuring it is aligned correctly. This step requires precision and a steady hand, as the crown must be seated fully and accurately. Once in position, the dentist will use a gentle but firm pressure to secure the crown, allowing the cement to set and create a permanent bond. This process might involve the use of a rubber dam to isolate the tooth, ensuring no moisture interferes with the cement's setting process.
Post-Placement Care: After the crown is cemented, the dentist will check the patient's bite again to make any necessary adjustments. This ensures the crown is comfortable and functions harmoniously with the opposing teeth. Patients are often advised to avoid chewing hard foods or applying excessive pressure on the crowned tooth for a short period, typically 24–48 hours, to allow the cement to fully set. Regular dental check-ups are essential to monitor the crown's integrity and overall oral health, ensuring the restoration's long-term success.
This permanent placement procedure is a testament to the dentist's skill and attention to detail, transforming a damaged tooth into a fully functional and natural-looking part of the patient's smile. It is a critical phase in the tooth capping journey, requiring precision and the right materials to achieve a durable and aesthetically pleasing result.
Substances and Their Impact: Unraveling How They Alter Tooth Structure
You may want to see also
![]()
Aftercare: Instructions for care, pain management, and follow-up visits
Proper aftercare is crucial to ensure the longevity and success of a dental crown. Once the procedure is complete, your dentist will provide specific instructions tailored to your needs, but there are general guidelines to follow. For the first 24 hours, avoid hot or cold foods and beverages to prevent sensitivity. Stick to soft foods like yogurt, mashed potatoes, or smoothies to minimize pressure on the crowned tooth. Gradually reintroduce harder foods as comfort allows, but always chew on the opposite side of the mouth to protect the new crown.
Pain management is a common concern after capping a tooth. Mild discomfort or sensitivity is normal for a few days, but it can be managed effectively. Over-the-counter pain relievers such as ibuprofen (200–400 mg every 6 hours) or acetaminophen (500–1000 mg every 6 hours) can alleviate pain. Avoid aspirin, as it may increase bleeding risk. If pain persists or worsens, contact your dentist immediately, as it could indicate an issue like an improper fit or infection. Applying a cold compress to the cheek for 15–20 minutes at a time can also reduce swelling and discomfort.
Oral hygiene plays a pivotal role in aftercare. Continue brushing twice daily and flossing once daily, but be gentle around the crowned tooth to avoid dislodging the temporary cement (if used). For those with permanent crowns, use non-abrasive fluoride toothpaste and a soft-bristled toothbrush to protect the restoration. Water flossers or interdental brushes can help clean hard-to-reach areas without damaging the crown. Avoid biting hard objects like ice, pens, or fingernails, as these habits can crack or dislodge the crown.
Follow-up visits are essential to monitor the crown’s stability and your overall oral health. Your dentist will schedule a check-up within a few weeks to ensure the crown fits properly and your bite is aligned. During this visit, they may make minor adjustments to improve comfort or function. Regular dental cleanings every six months are also critical to prevent decay around the crown margins. Neglecting these appointments can lead to complications like gum disease or crown failure, requiring costly repairs or replacements.
Finally, be mindful of unusual symptoms that warrant immediate attention. Persistent pain, sensitivity lasting longer than two weeks, or a loose crown are red flags. If you notice any changes in bite alignment or experience difficulty chewing, contact your dentist promptly. Early intervention can prevent further damage and ensure the crown remains functional for years to come. With diligent aftercare, a dental crown can restore both the appearance and functionality of your tooth, providing a durable solution for decades.
How Braces Gently Pull Teeth Forward: The Orthodontic Process Explained
You may want to see also
Frequently asked questions
A tooth cap, also known as a dental crown, is a custom-made restoration that covers a damaged or weakened tooth. It is needed to restore the tooth’s shape, size, strength, and appearance, often after procedures like root canals, large fillings, or to fix cracks or severe decay.
The dentist first numbs the tooth and surrounding area. They then file down the tooth to create space for the crown, ensuring it fits properly. Impressions or digital scans of the tooth are taken to create a custom crown, and a temporary cap is placed until the permanent one is ready.
Tooth caps can be made from various materials, including porcelain, ceramic, metal (like gold or alloy), or a combination of these. The choice depends on factors like the tooth’s location, aesthetic preferences, and budget.
The process typically requires two visits. The first visit involves preparing the tooth and taking impressions, which takes about 1-2 hours. The second visit, usually 2-3 weeks later, involves placing the permanent crown, which takes about 30-60 minutes.
With proper care, a tooth cap can last 10-15 years or longer. To maintain it, practice good oral hygiene, avoid biting hard objects, and attend regular dental check-ups. Treat the capped tooth like a natural tooth to ensure its longevity.