Dental bonding is a minimally invasive procedure where a dentist applies a tooth-colored resin material to repair or improve the appearance of a tooth. The process begins with the dentist selecting a shade of resin that matches the natural color of the patient’s teeth. The tooth surface is then gently etched with a mild acid solution to create a rough texture, which helps the bonding material adhere securely. After applying a conditioning liquid, the dentist molds and shapes the resin onto the tooth, sculpting it to achieve the desired form. A special curing light is used to harden the resin, and once set, the material is trimmed, shaped, and polished to blend seamlessly with the surrounding teeth. This technique is commonly used to repair chipped or cracked teeth, close gaps, improve the appearance of discolored teeth, or even as a cosmetic alternative to amalgam fillings. The entire procedure typically takes 30 minutes to an hour per tooth and requires no anesthesia unless the bonding is being used to fill a decayed tooth.
| Characteristics | Values |
|---|---|
| Purpose | To restore, protect, or improve the appearance of a damaged or decayed tooth. |
| Materials Used | Composite resin, bonding agent, etchant, and adhesive. |
| Steps | 1. Preparation (cleaning, etching, priming), 2. Bonding (applying adhesive and resin), 3. Shaping and curing, 4. Finishing and polishing. |
| Etching | Acid (usually phosphoric acid) is applied to create microscopic pores in the enamel for better adhesion. |
| Bonding Agent | A thin layer of adhesive is applied to create a strong bond between the tooth and composite resin. |
| Composite Resin | Tooth-colored material applied in layers, shaped, and hardened with a curing light. |
| Curing Time | Typically 20-40 seconds per layer, depending on the light source and material. |
| Finishing | Excess material is trimmed, and the restoration is polished to match the natural tooth surface. |
| Durability | Can last 5-10 years with proper care, depending on the location and patient habits. |
| Applications | Repairing chips, cracks, decay, closing gaps, and improving tooth appearance. |
| Aftercare | Avoid hard or sticky foods for 24 hours; maintain good oral hygiene and regular dental check-ups. |
| Advantages | Aesthetic, minimally invasive, preserves natural tooth structure, and quick procedure. |
| Limitations | Less durable than crowns or veneers; may stain or chip over time. |
What You'll Learn
- Surface Preparation: Cleaning, etching enamel/dentin with acid to create micro-pores for better adhesive bonding
- Primer Application: Applying hydrophilic primer to enhance adhesion by penetrating dentin tubules effectively
- Adhesive Layering: Bonding agent is applied, air-thinned, and light-cured to create a strong resin interface
- Restorative Material: Composite resin is placed, shaped, and cured to restore tooth structure and function
- Finishing & Polishing: Adjusting, smoothing, and polishing the restoration for proper occlusion and aesthetics
![]()
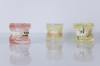
Surface Preparation: Cleaning, etching enamel/dentin with acid to create micro-pores for better adhesive bonding
Effective bonding begins with meticulous surface preparation, a critical step that determines the longevity and strength of the restoration. The process starts with cleaning the tooth to remove debris, bacteria, and remnants of damaged tissue. This is typically achieved using a pumice prophylaxis paste or an air-powder abrasion system, ensuring the surface is free from contaminants that could compromise adhesion. Without this initial step, even the most advanced bonding agents may fail to create a durable connection.
Once the tooth is clean, the next phase involves etching the enamel and dentin with phosphoric acid. This step is both art and science, requiring precision to create the ideal micro-porous structure. For enamel, a 35–37% phosphoric acid gel is applied for 15–30 seconds, depending on the manufacturer’s instructions. This etch time is crucial; too short, and the pores won’t form adequately; too long, and the enamel may become overly demineralized, weakening the structure. Dentin, being more delicate, requires a gentler approach—typically 15–20 seconds with the same acid concentration. The goal is to open up the dentinal tubules without causing excessive collagen exposure, which could lead to post-operative sensitivity.
The etching process transforms the tooth surface into a microscopic landscape of pores and irregularities, dramatically increasing the surface area available for adhesive penetration. This mechanical interlocking is the foundation of a strong bond. However, over-etching can be as detrimental as under-etching, leading to a brittle surface that fractures under stress. Dentists must balance precision and timing, often relying on visual cues such as a chalky white appearance for enamel and a slightly moist, matte finish for dentin to confirm successful etching.
After etching, the tooth is rinsed thoroughly to remove acid residue and dried carefully. Dentin, in particular, must be dried with oil-free air to prevent collapse of the collagen network while retaining a small amount of moisture—a state known as the "squirrel cage effect." This delicate balance ensures the adhesive can infiltrate the dentinal tubules without being repelled by a completely dry surface. Enamel, on the other hand, is fully dried to maximize the mechanical retention of the bonding agent.
Mastering surface preparation is a skill honed through practice and attention to detail. It’s a step that separates a mediocre restoration from one that lasts for years. By understanding the chemistry and mechanics of etching, dentists can optimize adhesion, ensuring the bonded material integrates seamlessly with the natural tooth structure. This meticulous process underscores the complexity of modern dentistry, where even the smallest step can have a profound impact on the final outcome.
Understanding Cavity Formation: How Decay Eats Away at Your Teeth
You may want to see also
![]()
Primer Application: Applying hydrophilic primer to enhance adhesion by penetrating dentin tubules effectively
Hydrophilic primers are a game-changer in modern adhesive dentistry, specifically designed to enhance bond strength by effectively penetrating dentin tubules. Unlike hydrophobic primers, which repel moisture, hydrophilic primers interact with water within the dentin, creating a stable and durable interface between the tooth and restorative material. This interaction is crucial because dentin is inherently moist, and managing this moisture is key to achieving optimal adhesion. By penetrating the tubules, hydrophilic primers form a hybrid layer that improves mechanical retention and reduces the risk of microleakage, a common cause of restoration failure.
The application process begins with proper dentin preparation, ensuring the surface is clean and free of debris. After etching the dentin with phosphoric acid, the hydrophilic primer is applied in a thin, even layer using a microbrush or applicator tip. The primer’s viscosity allows it to infiltrate the exposed collagen network within the dentin tubules, creating a foundation for resin infiltration. It’s essential to follow manufacturer guidelines for application time, typically allowing 15–30 seconds for the primer to penetrate before gently air-thinning the excess. Over-application can lead to pooling, while under-application may result in inadequate coverage, both compromising bond strength.
One of the standout advantages of hydrophilic primers is their ability to maintain adhesion in moist environments, making them particularly effective for vital dentin bonding. For example, in pediatric dentistry, where patient cooperation can be limited, hydrophilic primers offer a reliable solution for sealing dentin tubules in young, active teeth. Similarly, in elderly patients with exposed dentin due to gingival recession, these primers provide a stable bond despite the challenges of moisture control. Dosage-wise, a single coat is usually sufficient, but in deeper cavities or highly sclerotic dentin, a second application may enhance penetration.
Despite their benefits, hydrophilic primers require careful handling to avoid common pitfalls. Over-drying the dentin after etching can collapse the collagen network, hindering primer penetration. Conversely, excessive moisture can dilute the primer, reducing its effectiveness. Dentists should use a gentle air stream to remove surface water while leaving the dentin slightly moist. Additionally, compatibility with the bonding agent is critical; using a primer from a different system can lead to phase separation and weak bonding. Always pair hydrophilic primers with their corresponding adhesive systems for optimal results.
In conclusion, hydrophilic primers are a cornerstone of successful dentin bonding, offering superior adhesion by effectively penetrating dentin tubules. Their ability to manage moisture and create a stable hybrid layer makes them indispensable in various clinical scenarios, from pediatric to geriatric dentistry. By mastering their application—ensuring proper dentin preparation, precise timing, and compatibility with bonding agents—dentists can achieve long-lasting restorations with minimal risk of failure. This technique exemplifies the intersection of material science and clinical precision in modern dental practice.
How Braces Rotate Teeth: Understanding Orthodontic Mechanics and Movement
You may want to see also
![]()
Adhesive Layering: Bonding agent is applied, air-thinned, and light-cured to create a strong resin interface
The success of dental bonding hinges on creating a robust interface between the tooth and the restorative material. Adhesive layering, a meticulous process involving the application, air-thinning, and light-curing of a bonding agent, is the cornerstone of this strength. This technique ensures a micromechanical bond, where the resin infiltrates the microscopic irregularities of the tooth structure, creating a durable foundation for fillings, veneers, or other restorations.
Imagine a painter preparing a canvas. Just as a primer ensures paint adheres smoothly, the bonding agent acts as a crucial intermediary, bridging the gap between the organic tooth structure and the inorganic restorative material. This layer, typically composed of resin monomers and solvents, is carefully applied to the etched enamel and dentin, forming a hybrid layer that interlocks with the tooth's surface.
The application process demands precision. The bonding agent is dispensed onto the prepared tooth surface, often in a thin, even layer using a microbrush or applicator tip. Air-thinning follows, a critical step where gentle air blowing evaporates the solvent, concentrating the resin and promoting better penetration into the tooth's microstructure. This step is akin to a chef reducing a sauce, intensifying its flavor and consistency. Over-thinning, however, can compromise the bond strength, highlighting the need for careful technique.
The final step, light-curing, initiates polymerization of the resin monomers, transforming the liquid bonding agent into a solid, cross-linked structure. This process, typically achieved using a dental curing light with a specific wavelength (usually around 450-470 nm), requires careful attention to timing and intensity. Insufficient curing can lead to a weak bond, while excessive curing can cause overheating and potential damage to the tooth.
Mastering adhesive layering is essential for any dentist seeking to achieve long-lasting and aesthetically pleasing restorations. By understanding the science behind this process and adhering to precise techniques, dentists can ensure a strong and durable bond, ultimately contributing to the success of their dental procedures.
Dental Implants vs. Natural Teeth: Enhancing Your Smile and Appearance
You may want to see also
![]()
Restorative Material: Composite resin is placed, shaped, and cured to restore tooth structure and function
Composite resin stands as a cornerstone in modern restorative dentistry, offering a versatile solution to repair decayed, chipped, or fractured teeth. Its application begins with meticulous placement into the prepared tooth cavity, where it adheres seamlessly to the enamel and dentin. Unlike amalgam or gold fillings, composite resin can be precisely shaped to mimic the natural contours of the tooth, ensuring both aesthetic appeal and functional integrity. This malleability allows dentists to sculpt the material under a bright LED light, achieving a smooth surface that blends effortlessly with the surrounding tooth structure.
The curing process is where composite resin truly shines. Once shaped, the material is hardened using a specialized curing light, typically emitting a wavelength of 420–480 nm. This light initiates a polymerization reaction within the resin, transforming it from a soft, putty-like substance into a durable, tooth-colored restoration. The curing time varies depending on the specific resin system but generally ranges from 20 to 40 seconds per layer. Proper curing is critical, as under-cured resin can lead to weakness, discoloration, or premature failure of the restoration. Dentists often apply the resin in thin layers, curing each one individually to ensure thorough hardening and optimal bond strength.
One of the key advantages of composite resin is its ability to bond directly to tooth tissue. This bond is facilitated by the use of adhesive systems, which create a micromechanical interlocking between the resin and the tooth. Before placement, the tooth surface is etched with phosphoric acid (typically 37%) for 15–30 seconds, followed by the application of a bonding agent. This agent infiltrates the microscopic pores created by etching, forming a hybrid layer that enhances adhesion. Proper moisture control during this step is essential, as contamination with saliva or blood can compromise the bond. For children and adults alike, this technique ensures a strong, long-lasting restoration that can withstand the forces of chewing and biting.
While composite resin offers numerous benefits, it is not without limitations. Its longevity, for instance, is generally shorter than that of amalgam or ceramic restorations, particularly in high-stress areas like molars. Patients are advised to avoid staining foods and beverages (e.g., coffee, red wine) immediately after placement, as the resin can absorb pigments during the initial 24–48 hours. Additionally, composite restorations require regular maintenance, including professional polishing to remove surface stains and restore luster. Despite these considerations, composite resin remains a popular choice for its aesthetic superiority and conservative approach to tooth preservation.
In practice, the success of composite resin restorations hinges on the dentist’s skill and attention to detail. From precise cavity preparation to meticulous layering and curing, each step plays a pivotal role in achieving a functional and lifelike result. For patients, the outcome is a restored smile that not only looks natural but also preserves the integrity of the tooth. As dental technology advances, composite resin continues to evolve, offering improved wear resistance, reduced shrinkage, and enhanced aesthetics, solidifying its place as a go-to restorative material in contemporary dentistry.
Understanding Dead Teeth: Causes, Symptoms, and Treatment Options Explained
You may want to see also
![]()
Finishing & Polishing: Adjusting, smoothing, and polishing the restoration for proper occlusion and aesthetics
The final stages of dental bonding are where precision meets artistry. After the composite resin is cured, the restoration is only partially complete. Finishing and polishing are critical steps that ensure the bonded tooth functions seamlessly within the bite and blends naturally with the surrounding dentition. This phase demands a keen eye for detail and a delicate touch, as the dentist transforms a rough, freshly bonded surface into a smooth, aesthetically pleasing, and fully functional tooth.
Consider the process as akin to sculpting: the initial bonding lays the foundation, but it’s the finishing that refines the contours and texture. Using fine-grit diamond burs or carbide finishing instruments, the dentist meticulously adjusts the restoration to achieve proper occlusion—the way the teeth fit together when the jaws close. This step is crucial to prevent premature wear, discomfort, or damage to opposing teeth. For instance, if a bonded molar sits too high, it can interfere with the bite, leading to sensitivity or even TMJ issues. The dentist uses articulating paper to identify high spots and carefully reduces them until the bite feels harmonious. This adjustment is particularly vital in posterior teeth, where occlusal forces are highest.
Smoothing the restoration’s surface is the next step, eliminating any roughness that could irritate soft tissues or accumulate plaque. A series of progressively finer grits—starting with coarse (e.g., 120-grit) and ending with fine (e.g., 400-grit)—is used to gradually refine the surface. This process mirrors sanding wood, but with far greater precision. For anterior teeth, where aesthetics are paramount, achieving a lifelike texture is essential. The dentist may use flame-shaped burs to mimic the natural anatomy of the tooth, ensuring the restoration blends seamlessly with adjacent teeth.
Polishing is the final flourish, enhancing both function and appearance. A multi-step polishing system, often involving rubber cups and discs coated with polishing paste (e.g., aluminum oxide or diamond-impregnated pastes), is employed to create a high-gloss finish. This not only improves the tooth’s resistance to staining but also ensures it reflects light similarly to natural enamel. For composite restorations, a final polish with a super-fine grit (e.g., 800-grit) or a silicone polisher can achieve a near-perfect match to the surrounding teeth. Practical tip: always use a light touch during polishing to avoid overheating the composite, which can compromise its integrity.
The takeaway? Finishing and polishing are not mere afterthoughts but essential components of successful dental bonding. They bridge the gap between functionality and aesthetics, ensuring the restoration performs as well as it looks. By mastering these steps, dentists can deliver results that are not only durable but also indistinguishable from natural teeth. This attention to detail is what elevates a good restoration to a great one.
How Do Toothbrush Bristles Stay Secure and Effective Over Time?
You may want to see also
Frequently asked questions
Tooth bonding is a cosmetic dental procedure where a tooth-colored resin material is applied and hardened with a special light, bonding the material to the tooth to improve its appearance. It is commonly used to repair chipped or cracked teeth, close gaps, reshape teeth, or cover discoloration.
The tooth bonding process typically takes between 30 minutes to an hour per tooth, depending on the complexity of the case. It is usually completed in a single visit and requires no downtime.
No, tooth bonding is not permanent. The resin material can last between 3 to 10 years with proper care, but it may chip or stain over time. It is a more temporary and cost-effective solution compared to veneers or crowns.
In most cases, tooth bonding does not require anesthesia unless the procedure involves decay removal or the tooth is near the nerve. It is generally a painless and non-invasive process.
To maintain a bonded tooth, avoid biting hard objects, chewing ice, or using your teeth as tools. Brush twice daily, floss regularly, and avoid stain-causing foods and drinks like coffee, tea, or red wine. Regular dental check-ups are also essential to monitor the bonding.