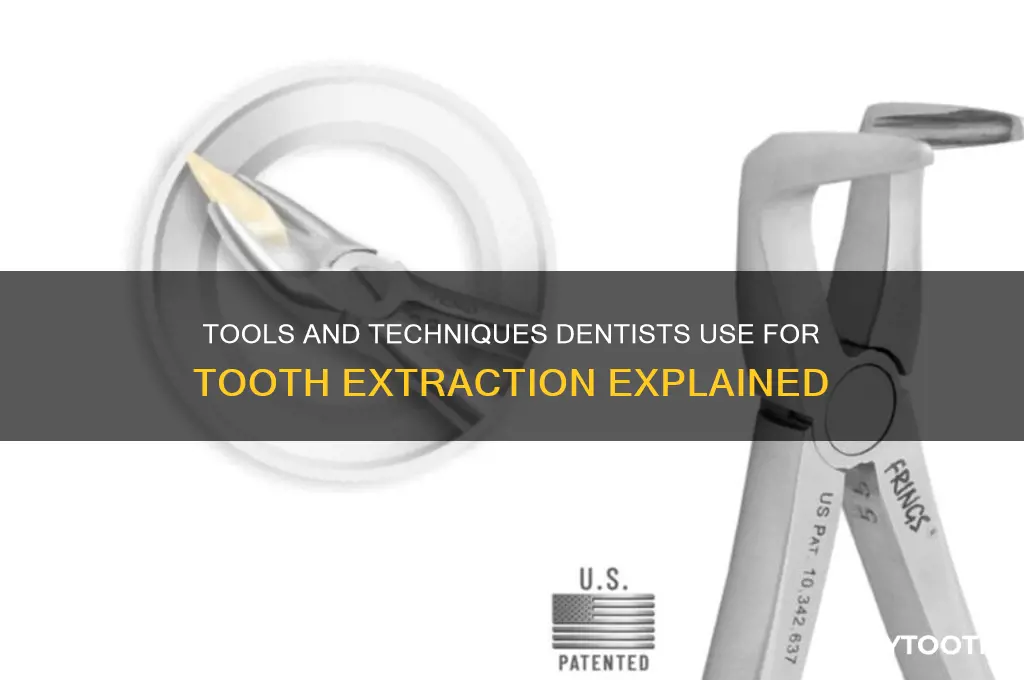
Dentists employ a variety of specialized tools and techniques to safely and efficiently extract a tooth, ensuring minimal discomfort and complications for the patient. The process typically begins with the administration of a local anesthetic to numb the area, followed by the use of instruments such as elevators, which are designed to loosen the tooth from its socket, and extraction forceps, which provide a firm grip to remove the tooth. In more complex cases, such as impacted teeth or those with extensive decay, dentists may also utilize surgical tools like drills or bone chisels to access and remove the tooth. Throughout the procedure, dentists prioritize patient comfort and employ advanced techniques to promote quick healing and reduce the risk of infection.
| Characteristics | Values |
|---|---|
| Instruments Used | Dental Elevators, Extraction Forceps, Dental Luxators, Bone Rongeurs |
| Anesthesia | Local anesthesia (e.g., lidocaine, articaine) |
| Procedure Type | Simple extraction (for visible teeth) or surgical extraction (for impacted or broken teeth) |
| Preparation Tools | Dental mirrors, probes, scalers, and dental drills (for surgical extractions) |
| Protective Gear | Gloves, masks, goggles, and protective clothing for the dentist and staff |
| Post-Extraction Care | Gauze, sutures (for surgical extractions), and pain management medications |
| Imaging Tools | X-rays or dental CT scans to assess tooth position and root structure |
| Patient Positioning | Reclined position with proper head support |
| Sterilization | Autoclave-sterilized instruments to prevent infection |
| Follow-Up | Instructions for aftercare, including avoiding certain foods and maintaining oral hygiene |
What You'll Learn
- Extraction Forceps: Specialized tools designed to grip and remove teeth with minimal tissue damage
- Elevators: Instruments used to loosen teeth by separating them from the alveolar bone
- Local Anesthesia: Numbing agents like lidocaine to ensure patient comfort during the extraction process
- Dental Syringes: Tools for delivering anesthesia precisely to the targeted nerve area
- Post-Extraction Care: Gauze, sutures, and medications to manage bleeding, pain, and prevent infection
![]()
Extraction Forceps: Specialized tools designed to grip and remove teeth with minimal tissue damage
Dentists rely on extraction forceps as a cornerstone tool for tooth removal, designed with precision to minimize tissue trauma. These instruments are not one-size-fits-all; they come in a variety of shapes and sizes, each tailored to specific tooth types and anatomical considerations. For instance, cowhorn forceps are ideal for extracting upper molars due to their curved beaks that match the root structure, while bayonet forceps are better suited for lower premolars, offering a straighter approach to grip the tooth securely.
The design of extraction forceps is a testament to ergonomic efficiency and patient safety. The handles are typically long and textured to provide the dentist with a firm grip, ensuring controlled force application. The beaks, the part that grips the tooth, are serrated to enhance traction without slipping. This design minimizes the risk of fracturing the tooth or damaging the surrounding alveolar bone, which is crucial for preserving the socket for future restorative procedures, such as implants.
Using extraction forceps requires a methodical approach. The dentist begins by placing the beaks around the tooth, ensuring they engage the cervical third of the root, where the tooth is widest and strongest. Gentle, steady pressure is then applied in a direction that follows the tooth’s natural eruption path. For example, upper teeth are typically extracted downward and outward, while lower teeth are removed in an upward and outward direction. This technique reduces the risk of root fracture and alveolar bone damage.
Despite their effectiveness, extraction forceps are not without limitations. They are most suitable for teeth with intact roots and sufficient structure for the forceps to grip. In cases of severely decayed, fractured, or impacted teeth, alternative methods such as surgical extraction or the use of elevators may be necessary. Additionally, patient factors like bone density and gum health can influence the choice of tool and technique. For older adults or patients with osteoporosis, for instance, extra caution is required to avoid excessive force that could compromise the jawbone.
In practice, extraction forceps are a blend of art and science, requiring both technical skill and anatomical understanding. Dentists often undergo extensive training to master their use, ensuring that tooth removal is as painless and non-invasive as possible. For patients, knowing that such specialized tools are employed can provide reassurance that their procedure is being handled with precision and care, minimizing discomfort and promoting faster healing.
DIY Tooth Extraction: Risks, Complications, and Why It's a Bad Idea
You may want to see also
![]()
Elevators: Instruments used to loosen teeth by separating them from the alveolar bone
Elevators are specialized dental instruments designed to loosen teeth by carefully separating them from the alveolar bone, a critical step in the extraction process. Unlike forceps, which grip and remove the tooth, elevators work by applying controlled leverage to break the periodontal ligaments and expand the bony socket. This technique minimizes trauma to the surrounding tissues, making it particularly useful for complex extractions or when preserving the alveolar ridge is essential. Dentists select from various elevator types—such as straight, curved, or coupland elevators—based on the tooth’s position, root structure, and the patient’s anatomy.
Consider the extraction of a multi-rooted molar, where the roots are fused or diverging. Here, a dentist might use a cryer elevator, characterized by its narrow, curved blade, to gently wedge between the root and bone. The instrument is inserted into the periodontal space and rotated with precise force to luxate the tooth. This process is repeated on multiple sides to ensure complete separation before forceps are employed. The key to success lies in gradual, controlled movements to avoid fracturing the roots or damaging the bone.
While elevators are indispensable, their use requires skill and caution. Overzealous application can lead to bone fractures, root breakage, or soft tissue injury. For instance, excessive force on a lower molar could compromise the inferior alveolar nerve, resulting in temporary or permanent paresthesia. Dentists must also consider patient factors, such as bone density in older adults or the presence of systemic conditions like osteoporosis, which may alter the bone’s response to elevation. Proper technique, coupled with a thorough understanding of anatomy, mitigates these risks.
In pediatric dentistry, elevators are often used for extracting primary teeth that fail to exfoliate naturally, a condition known as ankylosis. The thin, delicate roots of deciduous teeth require instruments like the warren elevator, which has a fine, tapered blade to navigate the small periodontal space without damaging the successor tooth. Parents should be reassured that this procedure is minimally invasive when performed correctly, with local anesthesia ensuring the child’s comfort. Post-extraction care, such as avoiding hard foods for 24 hours, aids in uneventful healing.
For practitioners, mastering elevator techniques involves hands-on training and continuous practice. Simulators and typodonts allow for repetition of movements in a risk-free environment, while mentorship from experienced dentists provides real-world insights. Staying updated on ergonomic designs, such as lightweight titanium elevators, can enhance precision and reduce hand fatigue during prolonged procedures. Ultimately, the elevator’s role in tooth extraction underscores the balance between force and finesse, a principle central to modern dental practice.
Post-Extraction Diet: Soft, Nutritious Foods to Eat After a Tooth Extraction
You may want to see also
![]()
Local Anesthesia: Numbing agents like lidocaine to ensure patient comfort during the extraction process
Local anesthesia is the cornerstone of patient comfort during tooth extractions, transforming a potentially painful procedure into a manageable experience. Dentists commonly use lidocaine, a fast-acting and reliable numbing agent, to block nerve signals in the targeted area. Administered via injection, lidocaine typically takes effect within 1-2 minutes and lasts for 30-60 minutes, providing ample time for the extraction. The dosage varies based on factors like the patient’s age, weight, and medical history, but a standard dose ranges from 1.8 to 3.6 mg per pound of body weight, with a maximum of 7 mg per pound in a single sitting. For children, lower concentrations and smaller volumes are used to minimize discomfort and risk.
The injection technique is as crucial as the anesthetic itself. Dentists often use a slow, steady approach to minimize pain during administration, employing a fine gauge needle to reduce tissue trauma. The location of the injection depends on the tooth being extracted; for example, a mandibular block anesthetizes the lower jaw, while an infiltration injection targets specific nerves near the tooth. Patients may feel a brief stinging sensation as the anesthetic takes effect, but this quickly gives way to numbness. Dentists may also add a vasoconstrictor like epinephrine to the solution to prolong the anesthetic effect and reduce bleeding, though this is avoided in patients with certain cardiovascular conditions.
While lidocaine is highly effective, it’s not the only option. Alternatives like articaine and mepivacaine offer similar benefits, with articaine being particularly useful for achieving profound anesthesia in the posterior teeth. For patients with allergies or sensitivities to amide-based anesthetics like lidocaine, ester-based options such as procaine may be considered, though these are less commonly used due to shorter duration and higher allergy rates. The choice of anesthetic depends on the patient’s medical history, the complexity of the extraction, and the dentist’s preference.
Practical tips can enhance the anesthetic experience. Patients are advised to avoid eating or drinking hot beverages until the numbness wears off to prevent accidental burns or injuries. Dentists may apply a topical numbing gel before the injection to reduce initial discomfort, especially for anxious patients. Post-procedure, patients should follow aftercare instructions carefully, including avoiding strenuous activity and taking prescribed pain medications as needed. While local anesthesia is generally safe, rare side effects like dizziness, swelling, or allergic reactions should be reported immediately.
In summary, local anesthesia, particularly lidocaine, is a vital tool in ensuring patient comfort during tooth extractions. Its effectiveness, combined with proper technique and patient care, makes the procedure far less daunting. By understanding the nuances of anesthetic use, both dentists and patients can approach extractions with confidence, knowing that pain management is a priority.
Post-Tooth Extraction Care: Essential Tips for Healing and Comfort
You may want to see also
![]()
4 Dental Syringes: Tools for delivering anesthesia precisely to the targeted nerve area
Dental syringes are the unsung heroes of tooth extractions, ensuring patients remain comfortable during procedures. Among the array of tools dentists use, four types of syringes stand out for their precision in delivering anesthesia to targeted nerve areas. Each is designed to minimize discomfort and maximize effectiveness, depending on the tooth’s location and the patient’s anatomy.
The Aspirating Syringe is the gold standard for safe anesthesia delivery. Before injecting, the dentist uses this syringe to create negative pressure, ensuring the needle is not in a blood vessel. This step is critical to prevent complications like hematomas or systemic anesthetic reactions. The syringe’s design allows for controlled injection of 1.8–3.6 mL of lidocaine or articaine, common local anesthetics, directly into the periodontal ligament or near the inferior alveolar nerve for lower molar extractions.
The Carpule Syringe, often paired with the aspirating syringe, houses the anesthetic cartridge. Its simple, disposable design ensures sterility and ease of use. Dentists prefer this for its reliability in delivering consistent doses, typically 1.7 mL per cartridge. For pediatric patients, lower doses (e.g., 0.5–1.0 mL) are used, adjusted for age and weight, to avoid toxicity.
The Computer-Assisted Syringe represents a leap in precision. This high-tech tool uses electronic controls to regulate injection speed and pressure, reducing patient discomfort. Studies show that slower injection rates (e.g., 1 mL/min) increase anesthetic efficacy by allowing better tissue diffusion. Ideal for anxious patients, this syringe minimizes the "pinch" sensation often associated with traditional injections.
The Wand STA (Single Tooth Anesthesia) Syringe is a game-changer for patients fearful of needles. Its computer-controlled system delivers anesthesia at a predetermined, slow rate, targeting specific nerves like the palatal or lingual nerves. This syringe is particularly useful for isolated tooth extractions, as it numbs only the targeted area, preserving sensation in surrounding tissues. Patients report less post-procedure numbness, a significant advantage over traditional methods.
In practice, the choice of syringe depends on the extraction’s complexity and the patient’s needs. For instance, a simple canine extraction might require only a carpule and aspirating syringe, while a wisdom tooth removal could benefit from the precision of the Wand STA. Proper technique, such as warming the anesthetic to body temperature (37°C) and using a 27-gauge needle for reduced tissue trauma, enhances outcomes.
Mastering these tools allows dentists to transform a potentially painful procedure into a manageable experience. By understanding each syringe’s unique features, practitioners can tailor anesthesia delivery, ensuring both safety and comfort for every patient.
Soft Foods to Eat After Wisdom Tooth Removal: A Healing Guide
You may want to see also
![]()
Post-Extraction Care: Gauze, sutures, and medications to manage bleeding, pain, and prevent infection
After a tooth extraction, the immediate post-care routine is crucial to ensure proper healing and prevent complications. One of the first steps involves managing bleeding, which is typically controlled by placing a gauze pack over the extraction site. The patient is instructed to bite down firmly on the gauze for 30 to 45 minutes, allowing a blood clot to form. This clot is essential for healing, as it protects the underlying bone and nerves. Changing the gauze every 30 minutes may be necessary if bleeding persists, but excessive manipulation of the site should be avoided to prevent dislodging the clot.
In some cases, sutures are used to close the extraction site, particularly for surgical extractions or when the wound needs additional support to heal. These sutures can be absorbable, dissolving on their own over time, or non-absorbable, requiring a follow-up appointment for removal. Patients with sutures must be cautious not to disturb them by rinsing vigorously or eating hard foods. Proper oral hygiene is still essential, but gentle care around the sutured area is key to avoiding irritation or infection.
Pain management is another critical aspect of post-extraction care. Dentists often recommend over-the-counter pain relievers such as ibuprofen (600–800 mg every 6–8 hours) or acetaminophen (500–1000 mg every 4–6 hours) for adults. For more severe pain, prescription medications like opioids may be provided, but these are typically reserved for complex extractions due to their side effects and potential for dependency. It’s important to follow the prescribed dosage and avoid alcohol while taking these medications.
Preventing infection is paramount after a tooth extraction. Dentists may prescribe antibiotics, such as amoxicillin (500 mg every 8 hours for adults), particularly for patients at higher risk of infection, such as those with weakened immune systems or pre-existing conditions. Additionally, patients are advised to avoid smoking, as it impairs healing and increases infection risk. Rinsing with warm salt water (1/2 teaspoon of salt in 8 ounces of water) 24 hours after the extraction can help keep the area clean, but vigorous rinsing should be avoided in the first few days.
Finally, practical tips can significantly enhance the post-extraction experience. Patients should stick to soft, cool foods like yogurt or smoothies for the first 24 hours and avoid hot liquids or straws, as suction can dislodge the blood clot. Applying an ice pack to the cheek in 20-minute intervals can reduce swelling, but this should be limited to the first 24–48 hours. Monitoring the site for signs of infection, such as persistent pain, fever, or unusual discharge, is essential, and any concerns should prompt a call to the dentist. By following these guidelines, patients can promote smooth healing and minimize discomfort after a tooth extraction.
Pulled Tooth Pus: Causes, Risks, and Prevention Explained
You may want to see also
Frequently asked questions
Dentists commonly use dental elevators, extraction forceps, and sometimes surgical instruments like scalpels or bone chisels, depending on the complexity of the extraction.
Yes, dentists use local anesthesia (e.g., lidocaine or novocaine) to numb the area around the tooth, ensuring the patient feels minimal to no pain during the extraction.
Dentists use dental elevators to gently rock the tooth back and forth, loosening the periodontal ligaments and alveolar bone holding it in place.
Yes, there are two main methods: simple extraction (for visible teeth) using forceps, and surgical extraction (for impacted or broken teeth), which may involve cutting gum tissue or removing bone.
After extraction, dentists place gauze over the socket to control bleeding, provide post-care instructions, and may prescribe antibiotics or pain medication to prevent infection and manage discomfort.