Making spruce gum is a traditional craft that connects us to the natural world, utilizing the resin of spruce trees to create a chewy, natural treat. This process begins by harvesting the sticky sap that oozes from the tree’s bark, typically in warmer months when the resin is more fluid. Once collected, the sap is cleaned of debris and impurities, then boiled or heated to soften and purify it further. After cooling, the resin is kneaded until it becomes pliable and can be shaped into small pieces or combined with natural flavorings like pine needles or berries. Spruce gum not only offers a unique, piney flavor but also serves as a sustainable and historical snack, rooted in the resourcefulness of indigenous cultures and early settlers.
| Characteristics | Values |
|---|---|
| Source Material | Spruce tree resin (sap) |
| Best Time for Harvesting | Spring and early summer when sap is flowing |
| Tree Identification | Look for spruce trees with weeping or oozing sap |
| Collection Method | Gently scrape or peel resin from the tree bark |
| Cleaning Process | Remove debris, dirt, and bark from the collected resin |
| Softening Method | Warm the resin in your hands or near a heat source (not too hot) |
| Chewing Preparation | Knead the softened resin until it becomes pliable and chewy |
| Flavor Enhancement | Optional: Add natural flavorings like wintergreen or mint leaves |
| Storage | Store in a cool, dry place, wrapped in wax paper or cloth |
| Shelf Life | Indefinite if stored properly |
| Historical Use | Traditionally used by Indigenous peoples and early settlers |
| Caution | Ensure the tree is healthy and not damaged excessively during harvesting |
| Environmental Impact | Harvest responsibly to avoid harming the tree |
What You'll Learn
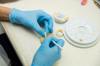
- Gathering Spruce Resin: Locate healthy spruce trees, identify oozing sap, and collect fresh, sticky resin carefully
- Cleaning the Resin: Remove debris, dirt, and bark from the resin using a knife or tweezers
- Softening the Resin: Warm the cleaned resin gently over a fire or in sunlight to make it pliable
- Chewing Technique: Knead the softened resin with clean hands, then chew slowly to mix with saliva
- Storing Spruce Gum: Wrap the finished gum in wax paper or store in a cool, dry place for later use
![]()
Gathering Spruce Resin: Locate healthy spruce trees, identify oozing sap, and collect fresh, sticky resin carefully
Spruce resin, the lifeblood of spruce gum, begins with a careful harvest from healthy trees. Look for mature spruces with robust, green needles and sturdy bark, signs of a tree actively producing sap. Avoid younger trees or those showing signs of disease, as their resin may be scarce or compromised. Healthy trees not only yield more resin but also ensure sustainability, allowing the tree to continue thriving after your harvest.
Identifying oozing sap requires a keen eye and patience. Resin often appears as small, amber droplets on the bark, usually where branches meet the trunk or where the tree has sustained minor damage. Gently press the bark around these areas to encourage more resin to flow. Fresh resin is sticky and fragrant, with a distinct piney aroma. Older, hardened resin is less ideal for spruce gum, as it lacks the pliability needed for chewing. Aim to collect resin during warmer months when sap flows more freely.
Collecting resin is a delicate process that demands respect for the tree. Use a small, clean knife or spatula to scrape the resin gently, taking care not to damage the bark. Aim to gather about 1-2 tablespoons of resin per tree, ensuring you leave enough for the tree’s natural defenses. Store the collected resin in a glass jar or airtight container to preserve its freshness. Avoid plastic containers, as the resin can adhere to them, making it difficult to remove later.
While gathering resin, consider the ethical and environmental impact of your actions. Harvest sparingly and only from trees on your property or with explicit permission. Over-harvesting can weaken a tree, making it susceptible to pests and diseases. By practicing mindful collection, you not only ensure a steady supply of resin for your spruce gum but also contribute to the health and longevity of the spruce forest. This approach aligns with traditional practices, where respect for nature was paramount in the art of crafting spruce gum.
Is Big Red Gum Still Around? Exploring Its Current Availability
You may want to see also
![]()
Cleaning the Resin: Remove debris, dirt, and bark from the resin using a knife or tweezers
The first step in transforming raw spruce resin into a chewable gum is ensuring it’s free from contaminants. Debris, dirt, and bark fragments not only detract from the final product’s texture but can also introduce unwanted flavors or even harmful substances. Think of this stage as the foundation of your spruce gum—a clean resin yields a pure, enjoyable result.
Begin by examining the resin closely under good light. Use a sharp knife or a pair of fine-tipped tweezers to carefully extract visible particles. For stubborn bark pieces embedded in the resin, gently pry them loose with the knife’s edge, taking care not to remove too much of the resin itself. This process requires patience; rushing can lead to unnecessary waste or incomplete cleaning.
A practical tip: warm the resin slightly by holding it near a heat source (like a lightbulb or warm water) to soften it, making debris removal easier. However, avoid direct heat, as it can alter the resin’s consistency. For smaller particles, a soft brush, like a clean toothbrush, can be used to sweep away surface impurities without damaging the resin.
Comparing this step to other resin-cleaning methods, such as washing with water or using solvents, highlights its simplicity and safety. Water can trap moisture in the resin, leading to mold, while solvents risk altering its natural properties. Manual cleaning with tools is not only effective but also preserves the resin’s integrity, ensuring the spruce gum retains its authentic flavor and texture.
In conclusion, cleaning the resin is a meticulous but essential task. By removing debris, dirt, and bark with precision, you set the stage for a high-quality spruce gum. This step may seem minor, but it’s the difference between a mediocre product and one that truly honors the natural essence of spruce resin.
COVID and Gum Pain: Unraveling the Connection and Symptoms
You may want to see also
![]()
Softening the Resin: Warm the cleaned resin gently over a fire or in sunlight to make it pliable
The resin of the spruce tree, a sticky, aromatic substance, holds a hidden potential. To unlock its transformative properties, one must first master the art of softening. This delicate process, akin to awakening a dormant spirit, requires a gentle touch and a keen understanding of nature's rhythms.
Imagine a sunny afternoon, the warm rays caressing the forest floor. Place your cleaned resin, free from debris and impurities, on a flat surface exposed to direct sunlight. The heat, though subtle, penetrates the resin's structure, coaxing its molecules into a more fluid state. This method, a testament to patience, is ideal for those seeking a slow, controlled transformation. Allow the resin to bask for 30-60 minutes, periodically testing its pliability by gently pressing with your finger. The goal is a texture reminiscent of taffy, soft yet resilient.
For a more immediate result, consider the primal allure of fire. Construct a small, contained flame, ensuring a consistent, low heat. Hold the resin at a safe distance, approximately 6-8 inches, allowing the warmth to envelop it. This technique demands vigilance; too close, and the resin may scorch, releasing its essence in a wisp of smoke. Rotate the resin constantly, observing its gradual transformation from brittle to supple. The process, akin to a dance, requires a delicate balance between heat and distance.
In both methods, the key lies in moderation. Overheating can lead to a loss of the resin's inherent properties, while insufficient warmth may leave it stubbornly rigid. The ideal temperature range, a sweet spot between 120-150°F (49-65°C), facilitates the desired molecular rearrangement without compromising the resin's integrity. As you experiment, trust your senses: sight, touch, and even smell will guide you in this ancient craft.
Softening spruce resin is a gateway to its myriad applications, from adhesive to medicinal uses. By harnessing the power of sunlight or fire, you become an alchemist, transforming a simple forest treasure into a versatile material. This step, often overlooked, is the cornerstone of spruce gum creation, where the raw material surrenders its secrets to the skilled and attentive hand. Master this technique, and you unlock a world of possibilities, blending tradition with the unique character of your craftsmanship.
Crafting Bubble Gum Flavor: Ingredients, Techniques, and Secrets Revealed
You may want to see also
![]()
Chewing Technique: Knead the softened resin with clean hands, then chew slowly to mix with saliva
The chewing technique is a pivotal step in transforming raw spruce resin into a pliable, enjoyable gum. Begin by kneading the softened resin with clean hands to ensure hygiene and to start the process of warming and shaping the material. This initial manipulation helps to break down the resin’s natural stickiness and prepares it for the next crucial phase: chewing. The hands act as the first tool, softening the resin further and making it more receptive to the mixing action of saliva.
Chewing slowly is not just a mechanical action but a deliberate process that requires patience. As you chew, the resin blends with saliva, which acts as a natural emulsifier, helping to smooth out the texture and create a cohesive mass. The slow pace allows the enzymes in saliva to work effectively, breaking down any remaining toughness in the resin. Aim for a steady rhythm, chewing for at least 5–10 minutes, depending on the initial consistency of the resin. Over-chewing can lead to fatigue, while under-chewing may result in a gummy, uneven texture.
A practical tip is to start with a small amount of resin, roughly the size of a grape, especially if you’re new to the process. This allows for easier handling and chewing without overwhelming your jaw muscles. For children or those with smaller mouths, even smaller portions are advisable. Always ensure hands are thoroughly washed before handling the resin to avoid introducing contaminants that could affect the gum’s quality or safety.
Comparing this technique to modern gum-making processes highlights its simplicity and reliance on natural methods. Unlike commercial gums, which use synthetic binders and flavorings, spruce gum relies entirely on the interaction between resin and saliva. This not only preserves the resin’s natural piney flavor but also connects the maker to traditional practices that have been used for centuries. The chewing technique is a testament to the resourcefulness of early gum-makers, who turned a forest resource into a functional and enjoyable product.
In conclusion, mastering the chewing technique is essential for crafting high-quality spruce gum. It combines physical manipulation with the body’s natural processes, resulting in a product that is both authentic and satisfying. By kneading the resin with clean hands and chewing slowly, you ensure a smooth, well-mixed gum that honors the tradition of this ancient practice. Patience and attention to detail are key, making this step as much an art as it is a science.
Achieve Brighter, Healthier Gums: Simple Tips for Whitening Naturally
You may want to see also
![]()
Storing Spruce Gum: Wrap the finished gum in wax paper or store in a cool, dry place for later use
Once your spruce gum is ready, proper storage is key to preserving its texture and flavor. Wrapping the finished gum in wax paper is a time-honored method that serves a dual purpose: it prevents the gum from drying out too quickly while allowing it to breathe, which helps maintain its pliability. Wax paper’s non-stick surface also ensures the gum doesn’t adhere to the wrapping, making it easy to unwrap when you’re ready to use it. This method is particularly useful if you plan to consume the gum within a few weeks, as it keeps it fresh without requiring additional storage conditions.
For longer-term storage, a cool, dry place is ideal. Spruce gum is sensitive to moisture and heat, both of which can cause it to become sticky, lose its texture, or develop mold. A pantry shelf or kitchen cabinet away from the stove or sink works well, provided the area remains consistently dry. Avoid refrigerating the gum, as the condensation that forms when it’s taken out can introduce moisture, spoiling its quality. If stored properly, spruce gum can last for several months, though its flavor and texture are best within the first few weeks.
Comparing the two storage methods, wax paper wrapping is more convenient for short-term use, while cool, dry storage is better for preserving larger batches over time. If you’re making spruce gum as a seasonal treat or for occasional use, wrapping individual pieces in wax paper is practical. However, if you’re producing it in bulk or as part of a tradition, storing it in an airtight container in a cool, dry place ensures it remains usable for extended periods. Both methods are simple and require minimal supplies, making them accessible for anyone crafting spruce gum at home.
A practical tip for those storing spruce gum long-term is to label the container with the date it was made. This helps you keep track of its freshness and ensures you use older batches first. Additionally, if you notice any signs of moisture or mold, discard the gum immediately, as it’s no longer safe to consume. By following these storage guidelines, you can enjoy your homemade spruce gum whenever the craving strikes, whether it’s a week or several months after preparation.
Mastering Gum Paste: Easy DIY Recipe for Cake Decorations
You may want to see also
Frequently asked questions
Spruce gum is a natural resin harvested from spruce trees, often chewed like gum. To make it, collect sap from the tree, clean it of debris, and soften it by warming it slightly before shaping it into chewable pieces.
A: Locate a spruce tree with visible sap oozing from its bark. Carefully scrape or peel the sap using a knife or tool, ensuring not to damage the tree. Collect the sap in a clean container for processing.
Yes, spruce gum can be flavored by adding natural ingredients like dried berries, mint leaves, or a pinch of cinnamon while warming the sap. Mix thoroughly before shaping it into gum.
Spruce gum is generally safe to chew, but ensure the sap is clean and free of contaminants. Avoid over-harvesting from a single tree, and be cautious if you have allergies to tree resins.
Store spruce gum in an airtight container in a cool, dry place. Wrapping it in wax paper or storing it in a glass jar can help preserve its texture and prevent it from sticking together.