Getting gum stuck on a retainer can be frustrating, but with the right approach, it’s a problem that can be easily resolved. Whether you’ve accidentally chewed gum while wearing your retainer or found a sticky residue left behind, removing it requires patience and the proper techniques to avoid damaging the retainer. Common methods include using dental tools, cold temperatures, or household items like peanut butter or vinegar to break down the gum’s adhesive properties. By following these steps carefully, you can restore your retainer to its original condition without compromising its functionality or hygiene.
| Characteristics | Values |
|---|---|
| Method | Various methods exist, including: freezing, using dental tools, soaking in cleaning solutions, brushing with toothpaste, and using commercial adhesive removers. |
| Effectiveness | Varies depending on the method and severity of gum buildup. Freezing and adhesive removers are generally most effective for stubborn gum. |
| Safety | Some methods may damage the retainer if not done carefully. Avoid using sharp tools or abrasive materials that can scratch the surface. |
| Time Required | Ranges from a few minutes (freezing) to several hours (soaking). |
| Cost | Most methods are inexpensive, using household items. Commercial removers may cost a few dollars. |
| Ease of Use | Varies; freezing and brushing are simple, while using dental tools requires more precision. |
| Frequency of Use | Regular cleaning prevents gum buildup, reducing the need for intensive removal methods. |
| Environmental Impact | Most methods are eco-friendly, but disposable commercial products may contribute to waste. |
| Availability of Materials | Most materials (e.g., toothpaste, freezer) are readily available at home. |
| Risk of Damage | High if using sharp tools or harsh chemicals. Always follow manufacturer guidelines for retainer care. |
What You'll Learn
- Freeze Method: Chill retainer to harden gum for easier removal with a tool
- Peanut Butter Trick: Apply peanut butter to loosen gum, then scrub gently
- Dental Tools: Use picks or brushes to carefully scrape off stuck gum
- Soaking Solutions: Soak in denture cleaner or vinegar to dissolve gum
- Preventive Tips: Avoid chewing gum with retainers to prevent future issues
![]()
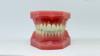
Freeze Method: Chill retainer to harden gum for easier removal with a tool
Chewing gum stuck on a retainer can be a stubborn nuisance, but the freeze method offers a simple, effective solution. By chilling the retainer, the gum hardens, making it easier to remove without damaging the appliance. This technique leverages basic science—low temperatures reduce the gum’s flexibility, transforming it from a sticky mess into a brittle substance that can be chipped away. It’s a go-to method for those seeking a quick fix without specialized tools or chemicals.
To execute the freeze method, start by placing the retainer in a sealed plastic bag to prevent moisture absorption or contamination. Then, submerge it in a bowl of ice water for 10–15 minutes or, for faster results, place it in the freezer for 5–7 minutes. Avoid over-freezing, as extreme cold can make the retainer brittle, especially if it’s made of acrylic. Once chilled, remove the retainer and use a blunt tool, like a plastic scraper or toothbrush handle, to gently pry or flake off the hardened gum. Work carefully to avoid scratching the retainer’s surface.
Comparatively, the freeze method stands out for its accessibility and safety. Unlike chemical solvents or sharp tools, it relies on temperature manipulation, making it suitable for all ages and retainer types. It’s particularly advantageous for clear aligners or delicate appliances, where abrasive methods could cause permanent damage. While it may not work as swiftly as commercial gum removers, its simplicity and low risk make it a preferred choice for many.
A key takeaway is that patience and precision are essential. Rushing the process or applying too much force can harm the retainer. For best results, follow up with a gentle cleaning using mild soap and warm water to remove any residue. This method not only removes gum effectively but also serves as a reminder of the importance of regular retainer maintenance to prevent such issues. With the freeze method, what once seemed like a sticky predicament becomes a manageable task.
Understanding the Timeline: How Quickly Periodontal Disease Develops
You may want to see also
![]()
Peanut Butter Trick: Apply peanut butter to loosen gum, then scrub gently
Peanut butter, a kitchen staple, doubles as an unexpected yet effective solution for removing gum from retainers. Its natural oils and sticky texture work together to break down the gum’s adhesive properties, making it easier to remove without damaging the retainer. This method is particularly useful for those who prefer household remedies over commercial cleaners.
To apply the peanut butter trick, start by scooping a small amount (about a teaspoon) of creamy peanut butter onto your fingertips. Avoid using crunchy varieties, as the nut pieces could scratch the retainer’s surface. Gently press the peanut butter onto the gum, ensuring it fully covers the stuck area. Let it sit for 5–10 minutes to allow the oils to penetrate and loosen the gum. Afterward, use a soft-bristled toothbrush or a retainer cleaning brush to scrub the area gently. Rinse the retainer thoroughly with warm water to remove any residue, and follow up with a regular cleaning routine to ensure hygiene.
While this method is effective, it’s important to consider a few cautions. Peanut butter can leave an oily film if not rinsed properly, so be thorough in your cleaning. Additionally, individuals with peanut allergies should avoid this method altogether, as even topical exposure can pose risks. For children or those with sensitive skin, test a small area first to ensure no irritation occurs.
Compared to other methods like freezing or using commercial solvents, the peanut butter trick stands out for its accessibility and gentleness. It’s a cost-effective solution that leverages everyday items, making it ideal for quick fixes. However, it may not be as efficient for large gum residues or deeply embedded pieces, where more intensive methods might be necessary.
In conclusion, the peanut butter trick is a practical, household-friendly approach to removing gum from retainers. Its simplicity and effectiveness make it a go-to option for minor gum removal tasks, though it’s essential to follow proper cleaning steps and consider individual sensitivities. With a bit of patience and the right technique, this method can save both time and money while keeping your retainer in top condition.
Achieve Healthy Pink Gums: Simple Tips for Gum Care and Color
You may want to see also
![]()
Dental Tools: Use picks or brushes to carefully scrape off stuck gum
Dental tools like picks and brushes are your allies in the battle against stubborn gum residue on retainers. These tools offer precision and control, allowing you to target specific areas without damaging the retainer’s surface. Unlike harsh chemicals or abrasive materials, picks and brushes are gentle yet effective, making them ideal for delicate orthodontic devices. The key lies in their design: picks have pointed ends for dislodging gum, while brushes feature bristles that scrub away remnants. Together, they form a dynamic duo for thorough cleaning.
To begin, select a dental pick with a fine, non-metallic tip to avoid scratching the retainer. Gently insert the pick under the edge of the gum and lift it away from the surface. Work slowly and methodically, focusing on one section at a time. For larger pieces, use a back-and-forth motion to loosen the gum before removing it entirely. Follow this by using a soft-bristled brush, such as an interdental brush or a retainer-specific cleaning brush, to scrub away any remaining particles. Dip the brush in warm water or a mild denture cleaner for added effectiveness.
While these tools are highly effective, caution is essential. Applying too much pressure can warp or crack the retainer, especially if it’s made of acrylic. Always use light, controlled movements, and avoid sharp or metal tools that could cause damage. For children or teenagers, adult supervision is recommended to ensure safe handling of picks and brushes. Additionally, clean the tools after each use to prevent bacterial buildup, which could transfer back to the retainer.
Comparing this method to alternatives highlights its practicality. Unlike soaking in vinegar or using peanut butter, which can be messy or time-consuming, dental tools provide immediate results with minimal effort. They’re also reusable, making them a cost-effective solution for long-term retainer maintenance. For best results, incorporate this technique into your daily cleaning routine to prevent gum buildup and ensure your retainer remains hygienic and functional.
In conclusion, dental picks and brushes are indispensable for removing gum from retainers. Their precision, gentleness, and ease of use make them superior to many other methods. By following proper techniques and precautions, you can keep your retainer clean and extend its lifespan, ensuring it continues to serve its purpose effectively.
Effective Ways to Remove Chewing Gum from Dentures Easily
You may want to see also
![]()
Soaking Solutions: Soak in denture cleaner or vinegar to dissolve gum
Denture cleaner and vinegar are two household staples that can effectively break down gum residue on retainers. Both work by dissolving the sticky polymers in gum, making it easier to remove without damaging the retainer. Denture cleaners typically contain effervescent agents like sodium bicarbonate and citric acid, which create a fizzing action that lifts debris. Vinegar, on the other hand, relies on its acetic acid content to soften and dissolve the gum. These solutions are particularly useful for stubborn gum that brushing alone can’t handle.
To use denture cleaner, dissolve one tablet in a glass of warm water, ensuring the solution fully covers the retainer. Let it soak for 15–30 minutes, depending on the severity of the gum buildup. For vinegar, mix equal parts white vinegar and warm water, and soak the retainer for 20–30 minutes. After soaking, use a soft-bristled toothbrush to gently scrub away any remaining gum. Both methods are safe for most retainer materials, but avoid using vinegar on metal components, as it can cause corrosion.
While denture cleaner is specifically formulated for oral appliances, vinegar is a more natural, cost-effective alternative. However, vinegar’s strong odor and potential to irritate sensitive skin are drawbacks. Denture cleaner, though pricier, is more convenient and less likely to require additional scrubbing. For best results, follow up either soak with a thorough rinse under warm water to remove any chemical residue.
A practical tip is to soak the retainer immediately after noticing gum residue, as fresh gum is easier to dissolve than hardened buildup. For children or teens with retainers, denture cleaner is often the safer choice, as it’s less likely to cause accidental ingestion of vinegar. Always check the retainer’s care instructions before using any soaking solution, and avoid prolonged exposure to vinegar or denture cleaner, as it may weaken the retainer over time.
In summary, soaking in denture cleaner or vinegar is a reliable method for dissolving gum on retainers. Denture cleaner offers convenience and effectiveness, while vinegar provides a budget-friendly, natural option. Both require minimal effort and yield noticeable results, making them go-to solutions for retainer maintenance. Choose based on preference, but always prioritize safety and follow-up care to keep your retainer in optimal condition.
Effective Ways to Safely Remove Denture Glue from Gums
You may want to see also
![]()
Preventive Tips: Avoid chewing gum with retainers to prevent future issues
Chewing gum while wearing a retainer is a recipe for disaster. The sticky nature of gum allows it to adhere stubbornly to the retainer's surface, often requiring tedious removal methods that can damage the appliance. This not only compromises the retainer's effectiveness but also poses a risk to your oral health if not cleaned properly. Understanding this risk is the first step in adopting preventive measures.
From a practical standpoint, avoiding gum altogether when wearing a retainer is the most straightforward solution. If you must chew gum, remove your retainer first and ensure your hands are clean to prevent transferring bacteria or debris. For younger retainer wearers, aged 12–18, parental guidance can be crucial in establishing this habit. Reminders and gentle enforcement can help ingrain this practice early on, reducing the likelihood of future issues.
Comparatively, while some may argue that sugar-free gum is less harmful, its adhesive properties remain a significant concern. Even sugar-free varieties contain ingredients like xylitol and gum base, which can still stick to retainers. Unlike food particles that can be easily rinsed away, gum requires more aggressive cleaning methods, such as using dental tools or soaking in specialized solutions, which can be time-consuming and potentially harmful to the retainer's material.
Persuasively, consider the long-term benefits of avoiding gum with retainers. By preventing gum from sticking to your retainer, you not only save time and effort but also extend the lifespan of your orthodontic appliance. This proactive approach aligns with broader oral hygiene practices, such as regular brushing and flossing, ensuring your teeth and gums remain healthy during and after orthodontic treatment. Small changes in habit can lead to significant improvements in oral health outcomes.
Descriptively, imagine the scenario: a retainer covered in gum residue, its once-smooth surface now marred by sticky remnants. The process of cleaning it involves scraping, soaking, and possibly even professional intervention. Contrast this with the simplicity of avoiding gum altogether. By making a conscious decision to skip gum while wearing your retainer, you eliminate the risk entirely, preserving both the retainer's integrity and your peace of mind. This preventive approach is not just practical—it’s transformative.
Effective Ways to Treat and Prevent Black Gums Naturally
You may want to see also
Frequently asked questions
The best way is to use a combination of cold temperatures and gentle scraping. Place the retainer in the freezer for 15–20 minutes to harden the gum, then carefully scrape it off with a plastic tool or toothbrush.
Avoid using hot water, as it can warp or damage the retainer. Stick to cold methods or room temperature solutions to safely remove the gum.
Yes, applying a small amount of peanut butter or oil (like coconut or olive oil) can help loosen the gum. Let it sit for a few minutes, then gently wipe or rinse it away.
After removing the gum, clean the retainer with mild soap and warm water or a denture cleaner. Brush gently with a soft toothbrush to ensure all residue is gone, then rinse thoroughly.