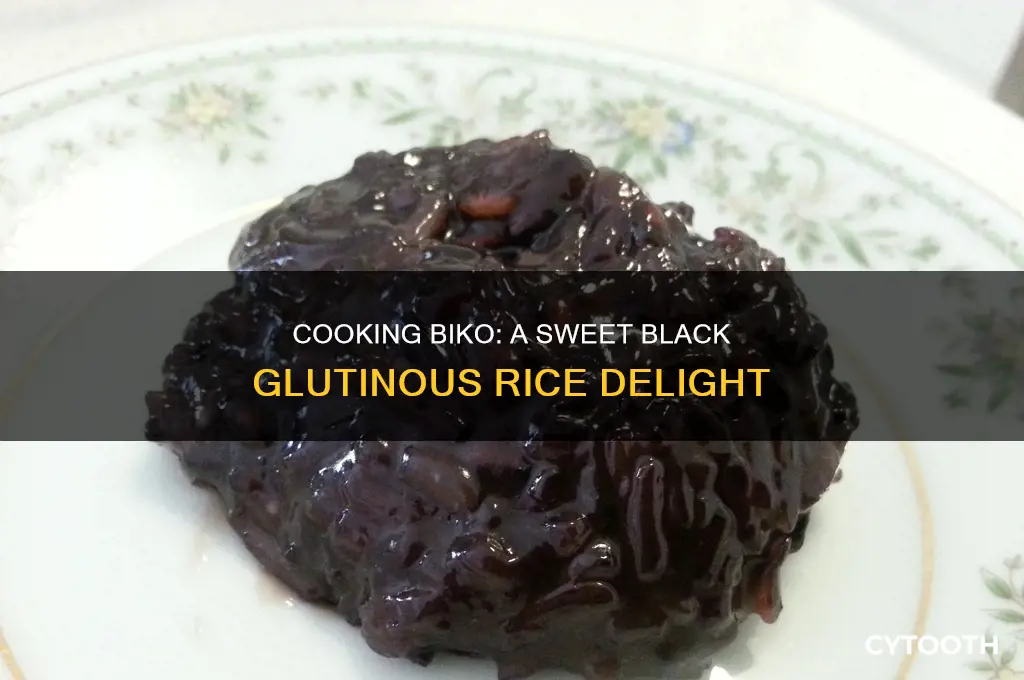
Biko, a beloved Filipino rice cake, is traditionally made with glutinous rice and coconut milk, but using black glutinous rice adds a unique twist with its deep purple hue and nutty flavor. Cooking biko with black glutinous rice involves soaking the rice to soften it, then simmering it in a rich mixture of coconut milk and brown sugar until it becomes thick and sticky. The dish is often topped with latik, a sweet coconut curd, for added texture and flavor. This variation not only enhances the visual appeal but also offers a healthier alternative due to the antioxidant properties of black glutinous rice. Perfect for special occasions or as a sweet treat, this version of biko combines tradition with innovation, making it a delightful addition to any dessert table.
What You'll Learn
- Preparing Black Glutinous Rice: Soak rice overnight, rinse, and drain for perfect texture
- Making Coconut Milk Mixture: Combine coconut milk, sugar, and salt; simmer until thickened
- Cooking the Rice: Boil rice in coconut mixture until liquid is absorbed
- Layering in a Pan: Spread cooked rice in a greased pan, press firmly
- Topping and Serving: Drizzle latik (coconut caramel) on top, chill, and slice to serve
![]()
Preparing Black Glutinous Rice: Soak rice overnight, rinse, and drain for perfect texture
Black glutinous rice, with its deep purple hue and nutty flavor, transforms biko into a visually stunning and uniquely delicious treat. However, its dense texture requires careful preparation to achieve the desired sticky yet tender consistency. The secret lies in a simple yet crucial step: soaking the rice overnight. This process hydrates the grains, reducing cooking time and ensuring even absorption of the coconut milk and sugar syrup that define biko’s signature sweetness.
Soaking black glutinous rice is not merely a suggestion—it’s a necessity. Unlike regular rice, black glutinous rice has a tougher outer layer that resists quick cooking. By submerging the rice in cold water for at least 8 hours (or ideally 12), you allow the grains to absorb moisture gradually. This softens the exterior, making it easier for the rice to cook evenly without becoming mushy or undercooked. Think of it as priming the canvas before painting; the rice becomes receptive to the flavors and textures you’ll introduce later.
After soaking, rinsing and draining the rice is equally important. Rinse the soaked rice under cold water until the water runs clear, removing any excess starch that could make the biko gummy. Drain it thoroughly to eliminate excess moisture, which could dilute the coconut milk mixture during cooking. This step ensures the rice retains its distinct texture while blending seamlessly with the other ingredients. It’s a delicate balance—too much starch, and the biko becomes sticky in the wrong way; too much water, and the dish loses its richness.
For best results, use a ratio of 1 cup of black glutinous rice to 2 cups of water for soaking. If you’re short on time, a quick-soak method involves boiling the rice for 5 minutes, then letting it sit in hot water for an hour, though overnight soaking yields superior results. Once soaked, rinsed, and drained, the rice is ready to be cooked in a mixture of coconut milk and sugar, absorbing the sweet, creamy essence that defines biko. This preparatory step may seem minor, but it’s the foundation of a perfectly textured dish—one that’s chewy, sweet, and undeniably satisfying.
Choosing the Right Bike Size for Your 5-Year-Old Child
You may want to see also
![]()
Making Coconut Milk Mixture: Combine coconut milk, sugar, and salt; simmer until thickened
The coconut milk mixture is the lifeblood of biko, infusing the black glutinous rice with sweetness and a rich, creamy texture. This step, though seemingly simple, demands attention to detail to achieve the perfect consistency and flavor balance. Combining coconut milk, sugar, and salt, then simmering until thickened, creates a luscious syrup that binds the rice together and caramelizes slightly during cooking, adding depth to the dish.
Mastering this mixture is crucial, as it determines the overall sweetness and moisture level of your biko. Too thin, and your biko will be soggy; too thick, and it will be dry and crumbly.
The Science Behind the Simmer:
Simmering the coconut milk mixture isn't just about heating it up. It's a delicate process of evaporation and reduction. As the mixture simmers, water content evaporates, concentrating the sugars and coconut solids, resulting in a thicker, more flavorful syrup. The salt, though present in small quantities, plays a vital role in enhancing the natural sweetness of the coconut milk and balancing the overall flavor profile.
Think of it as a culinary alchemy, transforming simple ingredients into a golden elixir that elevates the humble black glutinous rice to a delectable treat.
Practical Tips for Perfect Consistency:
- Low and Slow: Simmer the mixture over low heat, stirring occasionally to prevent scorching. Patience is key; rushing this step will lead to a grainy texture.
- Visual Cues: Aim for a consistency similar to maple syrup. It should coat the back of a spoon and leave a thin film when you run your finger through it.
- Taste as You Go: Adjust sweetness to your preference. Remember, the rice will absorb some of the sweetness, so err on the side of slightly sweeter than you'd like.
- Coconut Milk Quality Matters: Opt for full-fat coconut milk for a richer, creamier result. Avoid using light coconut milk, as it lacks the necessary fat content for proper thickening.
Troubleshooting:
If your mixture isn't thickening, continue simmering gently, stirring frequently. If it becomes too thick, add a splash of water to adjust the consistency.
By mastering the art of the coconut milk mixture, you'll unlock the secret to creating biko with a perfectly balanced sweetness, a luscious texture, and a flavor that will leave you craving more.
CycleBar's Bike Brand: Unveiling the Ultimate Indoor Cycling Experience
You may want to see also
![]()
Cooking the Rice: Boil rice in coconut mixture until liquid is absorbed
The heart of biko lies in the transformation of black glutinous rice from its raw, earthy state into a tender, coconut-infused delight. This pivotal step—boiling the rice in a coconut mixture until the liquid is absorbed—demands precision and patience. Unlike regular rice, black glutinous rice requires a longer cooking time and a generous amount of liquid to achieve its signature chewy texture. The coconut milk, rich and creamy, not only cooks the rice but also imparts a subtle sweetness and aromatic depth that defines the dish.
Begin by rinsing 2 cups of black glutinous rice under cold water until the water runs clear, removing any debris or excess starch. In a large, heavy-bottomed pot, combine the rinsed rice with 2 cans (about 4 cups) of coconut milk and 2 cups of water. The ratio of liquid to rice is crucial; too little, and the rice will remain undercooked; too much, and you risk a soggy, overcooked mess. Add ½ cup of brown sugar (adjust to taste) and a pinch of salt to balance the sweetness and enhance the coconut flavor. Stir well to dissolve the sugar and ensure even distribution.
As the mixture comes to a gentle boil, reduce the heat to low and let it simmer. Stir occasionally to prevent the rice from sticking to the bottom of the pot, especially as the liquid thickens. This process typically takes 40–50 minutes, but the exact time depends on the rice’s freshness and your stove’s heat distribution. The rice is ready when it has absorbed most of the liquid, and the grains are tender yet retain a slight chewiness. A good indicator is when the mixture thickens to a creamy, porridge-like consistency, and the coconut milk’s oil begins to separate slightly, creating a glossy sheen.
For those seeking a deeper flavor profile, consider adding a pandan leaf during cooking. This aromatic leaf, commonly used in Southeast Asian desserts, infuses the rice with a fragrant, floral note that complements the coconut beautifully. If pandan is unavailable, a few drops of vanilla extract added toward the end of cooking can achieve a similar effect. Remember, the goal is not to rush the process but to allow the rice and coconut milk to meld harmoniously, creating a base that’s both rich and comforting.
Finally, resist the urge to overcook the rice. While it’s tempting to keep stirring until every last bit of liquid is gone, doing so can lead to a mushy texture. The rice should still hold its shape, even as it absorbs the coconut mixture. Once cooked, spread the rice evenly in a greased tray or banana leaf-lined container, pressing it down gently to compact it. This step not only prepares the biko for the final topping but also ensures a cohesive, sliceable texture. Master this stage, and you’re well on your way to creating a biko that’s as visually appealing as it is delicious.
![]()
Layering in a Pan: Spread cooked rice in a greased pan, press firmly
The foundation of a perfect biko lies in the precision of layering. After cooking your black glutinous rice to a tender yet slightly chewy consistency, the next critical step is transferring it to a greased pan. This isn’t merely about containment—it’s about creating a uniform base that will hold together when sliced. Use a pan with a non-stick surface or generously grease a regular pan with coconut oil or butter to prevent sticking. The grease not only eases removal but also adds a subtle richness to the dish.
Spreading the cooked rice evenly requires both patience and technique. Start by pouring the rice into the center of the pan, then use a spatula or the back of a spoon to distribute it outward. Aim for a thickness of about 1 to 1.5 inches, ensuring consistency across the entire surface. Uneven spreading can lead to uneven cooking and a messy presentation when served. Think of this step as sculpting the canvas for your biko—a smooth, even layer sets the stage for the caramel topping to adhere perfectly.
Pressing the rice firmly is where the magic happens. Use a flat spatula or even your clean hands (lightly greased to avoid sticking) to compact the rice. Apply even pressure, working from the center outward to the edges. This step is crucial for achieving the desired density—too loose, and the biko falls apart; too tight, and it becomes unpleasantly hard. Aim for a texture that holds its shape but remains tender. For added precision, use a heavy object like a smaller pan or a weighted board to press down uniformly.
A practical tip for beginners: if you’re unsure about the firmness, press a small section first and test its consistency. The rice should hold together when lifted but still retain its individual grain texture. This balance ensures that each bite of biko is cohesive yet not overly compacted. Remember, the goal is to create a layer that complements the sticky sweetness of the caramel topping, not overpower it.
In essence, layering in a pan is a blend of art and science. It demands attention to detail—from greasing the pan to pressing the rice with just the right force. Master this step, and you’ll have a biko that’s not only visually appealing but also perfectly textured, slice after slice.
![]()
Topping and Serving: Drizzle latik (coconut caramel) on top, chill, and slice to serve
The final touch that transforms biko from a simple rice cake into a decadent treat is the addition of latik, a rich coconut caramel sauce. This topping not only enhances the visual appeal with its golden-brown sheen but also adds a depth of flavor that complements the earthy sweetness of black glutinous rice. To create latik, simmer coconut milk over low heat until it reduces to a thick, syrupy consistency, then continue cooking until it caramelizes into a fragrant, nutty sauce. The process requires patience, as rushing it can lead to burning, but the result is a luxurious topping that elevates the dish.
Once the biko is cooked and latik is prepared, the art of serving begins. Drizzle the latik generously over the surface of the biko, ensuring an even coating that allows the caramel to seep slightly into the rice. For a polished presentation, use a spoon to create a smooth, glossy finish. Afterward, chilling the biko in the refrigerator for at least 30 minutes is essential. This step firms up the rice, making it easier to slice into clean, neat squares. Chilling also allows the flavors to meld, enhancing the overall taste experience.
Slicing biko requires a sharp knife and a gentle hand. Dip the knife in hot water before each cut to prevent the rice from sticking and to achieve smooth edges. Serve the biko in squares or rectangles, depending on the desired portion size. For an extra touch, garnish with toasted sesame seeds or grated coconut for added texture and visual contrast. The combination of the chewy black glutinous rice, the sweet coconut base, and the luscious latik topping creates a harmonious balance of flavors and textures that is both comforting and indulgent.
While the traditional method of drizzling latik is tried and true, there’s room for creativity. For a modern twist, consider layering the biko with a thin spread of latik in the middle before adding the final drizzle on top. This creates a surprise element of caramel in every bite. Alternatively, for a lighter version, reduce the amount of latik and pair the biko with fresh mango slices or a dollop of whipped cream. Whether sticking to tradition or experimenting, the key is to let the latik shine as the star topping that completes this beloved Filipino dessert.
Frequently asked questions
Biko made with black glutinous rice is a Filipino rice cake that uses black glutinous rice instead of the usual white glutinous rice. It differs in color, texture, and flavor, offering a deeper purple hue, a chewier consistency, and a nuttier taste compared to traditional biko.
Rinse the black glutinous rice thoroughly until the water runs clear, then soak it in water for at least 4 hours or overnight. This helps soften the rice and reduce cooking time. Drain the soaked rice before cooking it with coconut milk and sugar for the biko.
You can use regular coconut milk, but because black glutinous rice absorbs more liquid, you may need to add slightly more coconut milk or water during cooking. Monitor the mixture closely to ensure it doesn’t dry out or burn, and adjust the liquid as needed.