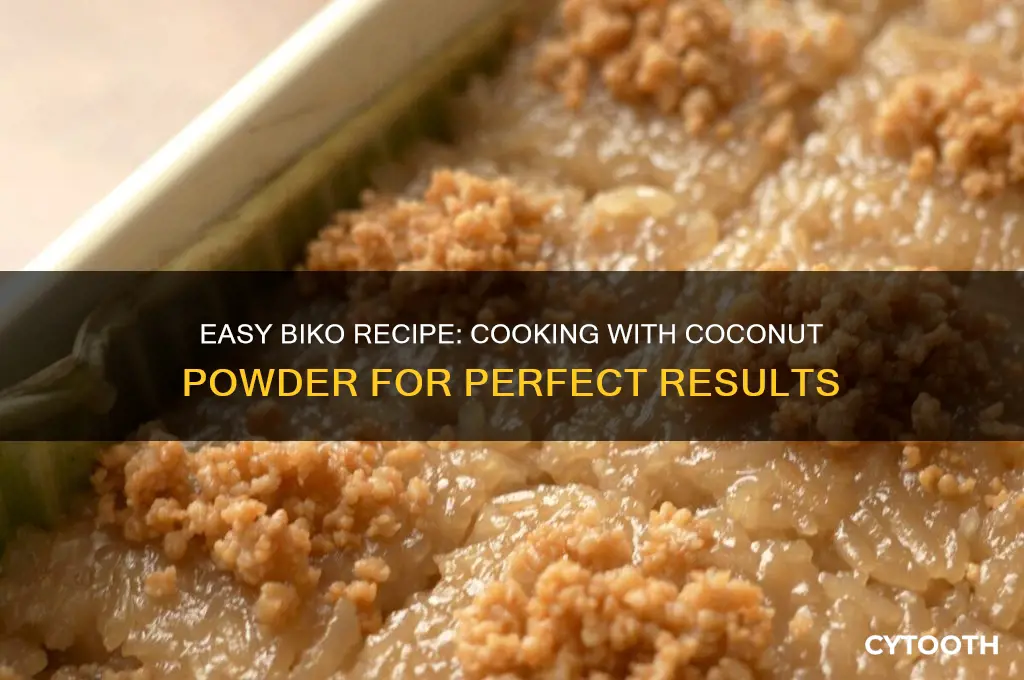
Biko, a beloved Filipino rice cake, is traditionally made with glutinous rice, coconut milk, and brown sugar, but using coconut powder offers a convenient and equally delicious alternative. Coconut powder, derived from dehydrated coconut milk, provides the same rich, creamy flavor without the need for refrigeration or the risk of spoilage. To cook biko using coconut powder, start by reconstituting the powder with warm water to create a coconut milk substitute. Combine this with glutinous rice, brown sugar, and a pinch of salt, then simmer the mixture until the rice is tender and the liquid has been absorbed, resulting in a sticky, sweet, and coconut-infused treat. This method is perfect for those who want to enjoy the authentic taste of biko with the ease of pantry-stable ingredients.
What You'll Learn
- Preparing Coconut Powder Mixture: Mix coconut powder with water, sugar, and salt until smooth and creamy
- Cooking Glutinous Rice: Rinse rice, boil in water until soft, then drain excess liquid
- Layering Biko in Pan: Spread cooked rice in a greased pan, add coconut mixture, repeat layers
- Baking or Steaming Biko: Steam or bake layered biko until firm and coconut mixture thickens
- Topping and Serving: Sprinkle latik (coconut curds) on top, let cool, then slice and serve
![]()
Preparing Coconut Powder Mixture: Mix coconut powder with water, sugar, and salt until smooth and creamy
The coconut powder mixture is the heart of biko made with coconut powder, providing the creamy, sweet base that defines this Filipino delicacy. To achieve the perfect consistency, start by measuring your ingredients precisely: for every 1 cup of coconut powder, use 1 ½ cups of warm water, ½ cup of sugar, and a pinch of salt. Warm water dissolves the sugar and hydens the coconut powder more effectively than cold water, ensuring a smoother texture. Combine these in a mixing bowl, stirring vigorously to break up any lumps. The goal is a homogeneous, velvety mixture that clings to the spoon without being too thick or runny.
While the process seems straightforward, small adjustments can make a significant difference. If the mixture feels grainy, let it sit for 5 minutes to allow the coconut powder to fully absorb the liquid, then whisk again. For a richer flavor, substitute a portion of the water with coconut milk, though this may alter the consistency slightly. Taste as you mix—adjust the sugar if the coconut powder’s natural sweetness isn’t balanced, or add a touch more salt to enhance the overall flavor profile. This step is not just about combining ingredients; it’s about creating a foundation that will harmonize with the glutinous rice in the final dish.
A common mistake is rushing the mixing process, leading to uneven distribution of sugar or a gritty texture. Patience is key. Use a whisk or a handheld mixer for best results, ensuring every grain of coconut powder is fully incorporated. If you’re working in a humid environment, the mixture may thicken faster, so have a little extra warm water on hand to adjust the consistency. Conversely, in drier climates, you might need slightly less liquid. The ideal texture should resemble thin custard—smooth enough to pour but thick enough to coat the rice without making it soggy.
This coconut powder mixture serves dual purposes in biko: as a cooking liquid for the rice and as a topping layer. Its creamy consistency ensures the rice absorbs just enough moisture to become tender without becoming mushy. When poured over the cooked rice, it forms a caramelized crust when baked or broiled, adding a delightful contrast in texture. Mastering this mixture is the secret to biko that’s both cohesive and layered in flavor, proving that even the simplest steps can elevate a traditional dish.
CycleBar's Bike Brand: Unveiling the Ultimate Indoor Cycling Experience
You may want to see also
![]()
Cooking Glutinous Rice: Rinse rice, boil in water until soft, then drain excess liquid
Glutinous rice, the star of biko, demands a precise cooking technique to achieve its signature chewy texture. Rinsing the rice thoroughly before cooking is non-negotiable. This step removes excess starch, preventing the grains from clumping together and ensuring a lighter, more separate texture in the final dish. Aim for at least three rinses, or until the water runs clear.
Boiling glutinous rice is an art of patience. Unlike regular rice, it requires a higher water-to-rice ratio—typically 2:1—to fully hydrate the dense grains. Bring the rice and water to a boil, then reduce the heat to a gentle simmer. Cover the pot and let it cook undisturbed for 20–25 minutes. Resist the urge to lift the lid frequently, as this releases steam and disrupts the cooking process.
Draining excess liquid is a critical step often overlooked. Once the rice is soft and translucent, tilt the pot slightly and carefully pour out the remaining water. Leave the rice in the pot for 5–10 minutes to steam, allowing it to absorb any residual moisture. This ensures the rice is tender but not waterlogged, creating the perfect base for biko’s coconut-infused layers.
For those using coconut powder in their biko, the cooked glutinous rice should be slightly firmer than usual, as it will absorb additional moisture from the coconut mixture. Test the rice by pressing a grain between your fingers—it should be soft but not mushy. This balance is key to achieving biko that holds its shape yet melts in your mouth.
A practical tip: if you’re short on time, consider soaking the glutinous rice for 30 minutes before rinsing and cooking. This reduces cooking time by 5–10 minutes and yields a more consistent texture. Remember, the goal is not just to cook the rice but to prepare it as the ideal canvas for the sweet, coconut-rich layers that define biko.
Choosing the Right Bike Size for Your 5-Year-Old Child
You may want to see also
![]()
Layering Biko in Pan: Spread cooked rice in a greased pan, add coconut mixture, repeat layers
The layering technique is a crucial step in achieving the perfect texture and flavor distribution in Biko, a traditional Filipino rice cake. This method ensures that every bite is a harmonious blend of sticky rice and sweet coconut, creating a delightful contrast in both taste and mouthfeel. Here's a breakdown of the process and its significance.
The Art of Layering: Begin by preparing your cooked rice, ensuring it is slightly sticky but not mushy. Use a greased pan, preferably a rectangular one, to facilitate even layering. Spread a thin, even layer of rice across the pan's surface, aiming for a consistent thickness. This initial layer sets the foundation for the Biko's structure. Next, introduce the coconut mixture, a blend of coconut powder, milk, and sugar, which adds a rich, tropical flavor. Pour a generous amount over the rice, allowing it to seep into the grains slightly. The key is to create distinct layers without completely saturating the rice.
Building Flavors: Repeat this process, alternating between rice and coconut mixture layers. Each layer should be thin, allowing the flavors to meld together without becoming overly dense. The repetition of this process creates a beautiful, striped pattern when the Biko is cut, making it as visually appealing as it is delicious. Aim for at least three layers, but feel free to add more for a thicker treat. The top layer should be rice, providing a smooth surface for the final step.
Practical Tips: For a standard 9x13-inch pan, use approximately 3 cups of cooked rice and a coconut mixture made from 2 cups of coconut powder, 1 cup of coconut milk, and 1/2 cup of sugar. Adjust the sweetness to your preference. Greasing the pan with coconut oil adds a subtle flavor enhancement. When spreading the rice, use a spatula to press it gently, ensuring a compact layer. This technique is particularly engaging for those who enjoy a hands-on approach to cooking, as it requires attention to detail and a creative eye.
Mastering the Technique: The layering process is a delicate balance, as too much liquid can make the Biko soggy, while dry layers may result in a crumbly texture. Practice makes perfect, and with each attempt, you'll refine your technique. This method is a testament to the precision and care that goes into Filipino cuisine, where simple ingredients are transformed into exquisite dishes through meticulous preparation. By mastering this layering technique, you'll create a Biko that is not only delicious but also a work of culinary art.
Cooking Biko: A Sweet Black Glutinous Rice Delight
You may want to see also
![]()
Baking or Steaming Biko: Steam or bake layered biko until firm and coconut mixture thickens
The choice between baking and steaming biko significantly impacts its texture and flavor profile. Baking imparts a subtle crust on the top layer, enhancing the caramelized sweetness of the coconut powder and brown sugar mixture. Steaming, on the other hand, yields a uniformly moist and tender biko, ideal for those who prefer a softer, more cohesive bite. Both methods require careful monitoring to ensure the coconut mixture thickens properly without burning or becoming watery.
To bake biko, preheat your oven to 350°F (175°C) and use a heat-resistant baking dish. Layer the glutinous rice evenly, followed by the coconut powder and sugar mixture, repeating until all ingredients are used. Cover the dish with aluminum foil to prevent excessive browning, and bake for 45–60 minutes. Remove the foil halfway through to allow the top layer to caramelize. For steaming, use a traditional steamer or a makeshift setup with a pot and steamer basket. Steam the layered biko for 40–50 minutes, ensuring the coconut mixture thickens and the rice becomes firm but not mushy.
A critical step in both methods is testing for doneness. Insert a toothpick into the center of the biko; if it comes out clean and the coconut mixture has thickened to a jam-like consistency, it’s ready. Baking tends to concentrate flavors more intensely, while steaming preserves a milder, more delicate taste. Consider your preference for texture and flavor intensity when choosing your method.
For best results, use 1 cup of coconut powder for every 2 cups of glutinous rice, adjusting the sugar to balance sweetness. If using coconut powder, rehydrate it with warm water to mimic the texture of fresh coconut. Avoid overmixing the layers, as this can cause the rice to lose its distinct texture. Whether baked or steamed, allow the biko to cool completely before slicing to achieve clean, picture-perfect portions.
Ultimately, the decision to bake or steam biko comes down to personal preference and the desired outcome. Baking offers a slightly crispy, caramelized edge, while steaming delivers a uniformly soft and moist treat. Both methods, when executed with precision, result in a delicious biko that celebrates the rich flavors of coconut powder and glutinous rice. Experiment with both techniques to discover which aligns best with your taste and culinary style.
![]()
Topping and Serving: Sprinkle latik (coconut curds) on top, let cool, then slice and serve
The final touch that elevates biko from a simple rice cake to a decadent treat is the addition of latik, those golden, caramelized coconut curds that crown each slice. Making latik from coconut powder is a clever shortcut, offering the same rich flavor and texture without the labor-intensive process of reducing fresh coconut milk. To create latik, mix ½ cup of coconut powder with ¼ cup of water until smooth, then simmer the mixture over low heat, stirring constantly, until it thickens and forms small, crumbly curds. This step requires patience—rush it, and you’ll burn the mixture; neglect it, and it’ll clump instead of curdle. Once the latik is ready, sprinkle it generously over the cooled biko, ensuring every slice gets a fair share of this sweet, toasty garnish.
While latik is the star topping, its role extends beyond mere decoration. It adds a textural contrast to the sticky, soft biko, creating a delightful interplay of crunch and chewiness. The caramelized flavor of latik also complements the subtle sweetness of the coconut-infused rice, enhancing the overall taste profile. For a modern twist, consider mixing a pinch of sea salt into the latik before sprinkling it on top—the salty notes will balance the sweetness and elevate the dish to a more sophisticated level. Just be mindful of the quantity; too much latik can overwhelm the biko, while too little leaves it feeling incomplete.
Cooling the biko before slicing is a step often overlooked but crucial for achieving clean, presentable portions. After spreading the latik, let the biko rest at room temperature for at least 30 minutes or until it firms up. If you’re in a hurry, refrigerate it for 15–20 minutes, but avoid freezing, as it can alter the texture. When slicing, use a sharp knife dipped in warm water to prevent the rice from sticking to the blade. Cut into squares or rectangles, ensuring each piece is evenly topped with latik. For a fancier presentation, arrange the slices on a platter with fresh mango slices or a drizzle of coconut cream.
Serving biko is an art in itself, especially when entertaining. This dish pairs beautifully with a cup of strong, black coffee or a glass of cold milk to balance its richness. For a festive touch, wrap individual slices in banana leaves or wax paper tied with twine—a nod to traditional Filipino packaging. If storing leftovers, keep them in an airtight container at room temperature for up to 2 days, or refrigerate for up to a week. Reheat gently in the microwave or steamer to restore its original texture. With its perfect blend of simplicity and indulgence, biko topped with latik is a dessert that never fails to impress.
Frequently asked questions
Yes, coconut powder can be used as a substitute for fresh coconut in making biko. Simply mix the coconut powder with warm water to rehydrate it before adding it to the recipe.
Use about 1 cup of coconut powder mixed with 1/2 cup of warm water to replace 2 cups of freshly grated coconut in your biko recipe.
Yes, since coconut powder absorbs moisture, you may need to add a bit more liquid (like water or coconut milk) to the recipe to ensure the biko doesn’t become too dry.
Coconut powder can slightly alter the texture, making it less fibrous than fresh coconut, but the taste remains coconutty. For a closer texture match, blend the rehydrated coconut powder before adding it to the recipe.